Backpacking The Enchantments Trail
The Enchantments is a region in Washington state with a group of pristine alpine lakes that can only be accessed by foot. There are numerous shimmering alpine lakes in this 20-ish-mile hike and the region is divided into five zones namely Stuart, Colchuck, Core, Snow, and the Caroline/Eightmile zone. The division of this region into zones is mostly important for those looking to camp in the Enchantments as the permit process requires you to select a zone where you intend to camp. Otherwise, through hikers (day hikers) that don’t intend to camp need not get into the nitty-gritty of zones. The most popular of these zones, and rightly so are the Core, Colchuck and Snow zones, in that order.
You may have heard and read about this hike being challenging and physically grueling, and possibly Aasgard Pass being responsible for most of the infamy. None of that being false but with the right kind of preparation and planning, though the hike will still not be a breeze, it can be enjoyed and made worth the effort. Is it worth the toil? – We think it absolutely is, especially if you love experiencing the best of what nature has to offer. The sections below attempt to capture all information and break down details required to hike the Enchantments trail.
The Enchantments Trail Hiking Guide
The Enchantments trail can be hiked in the following two ways:
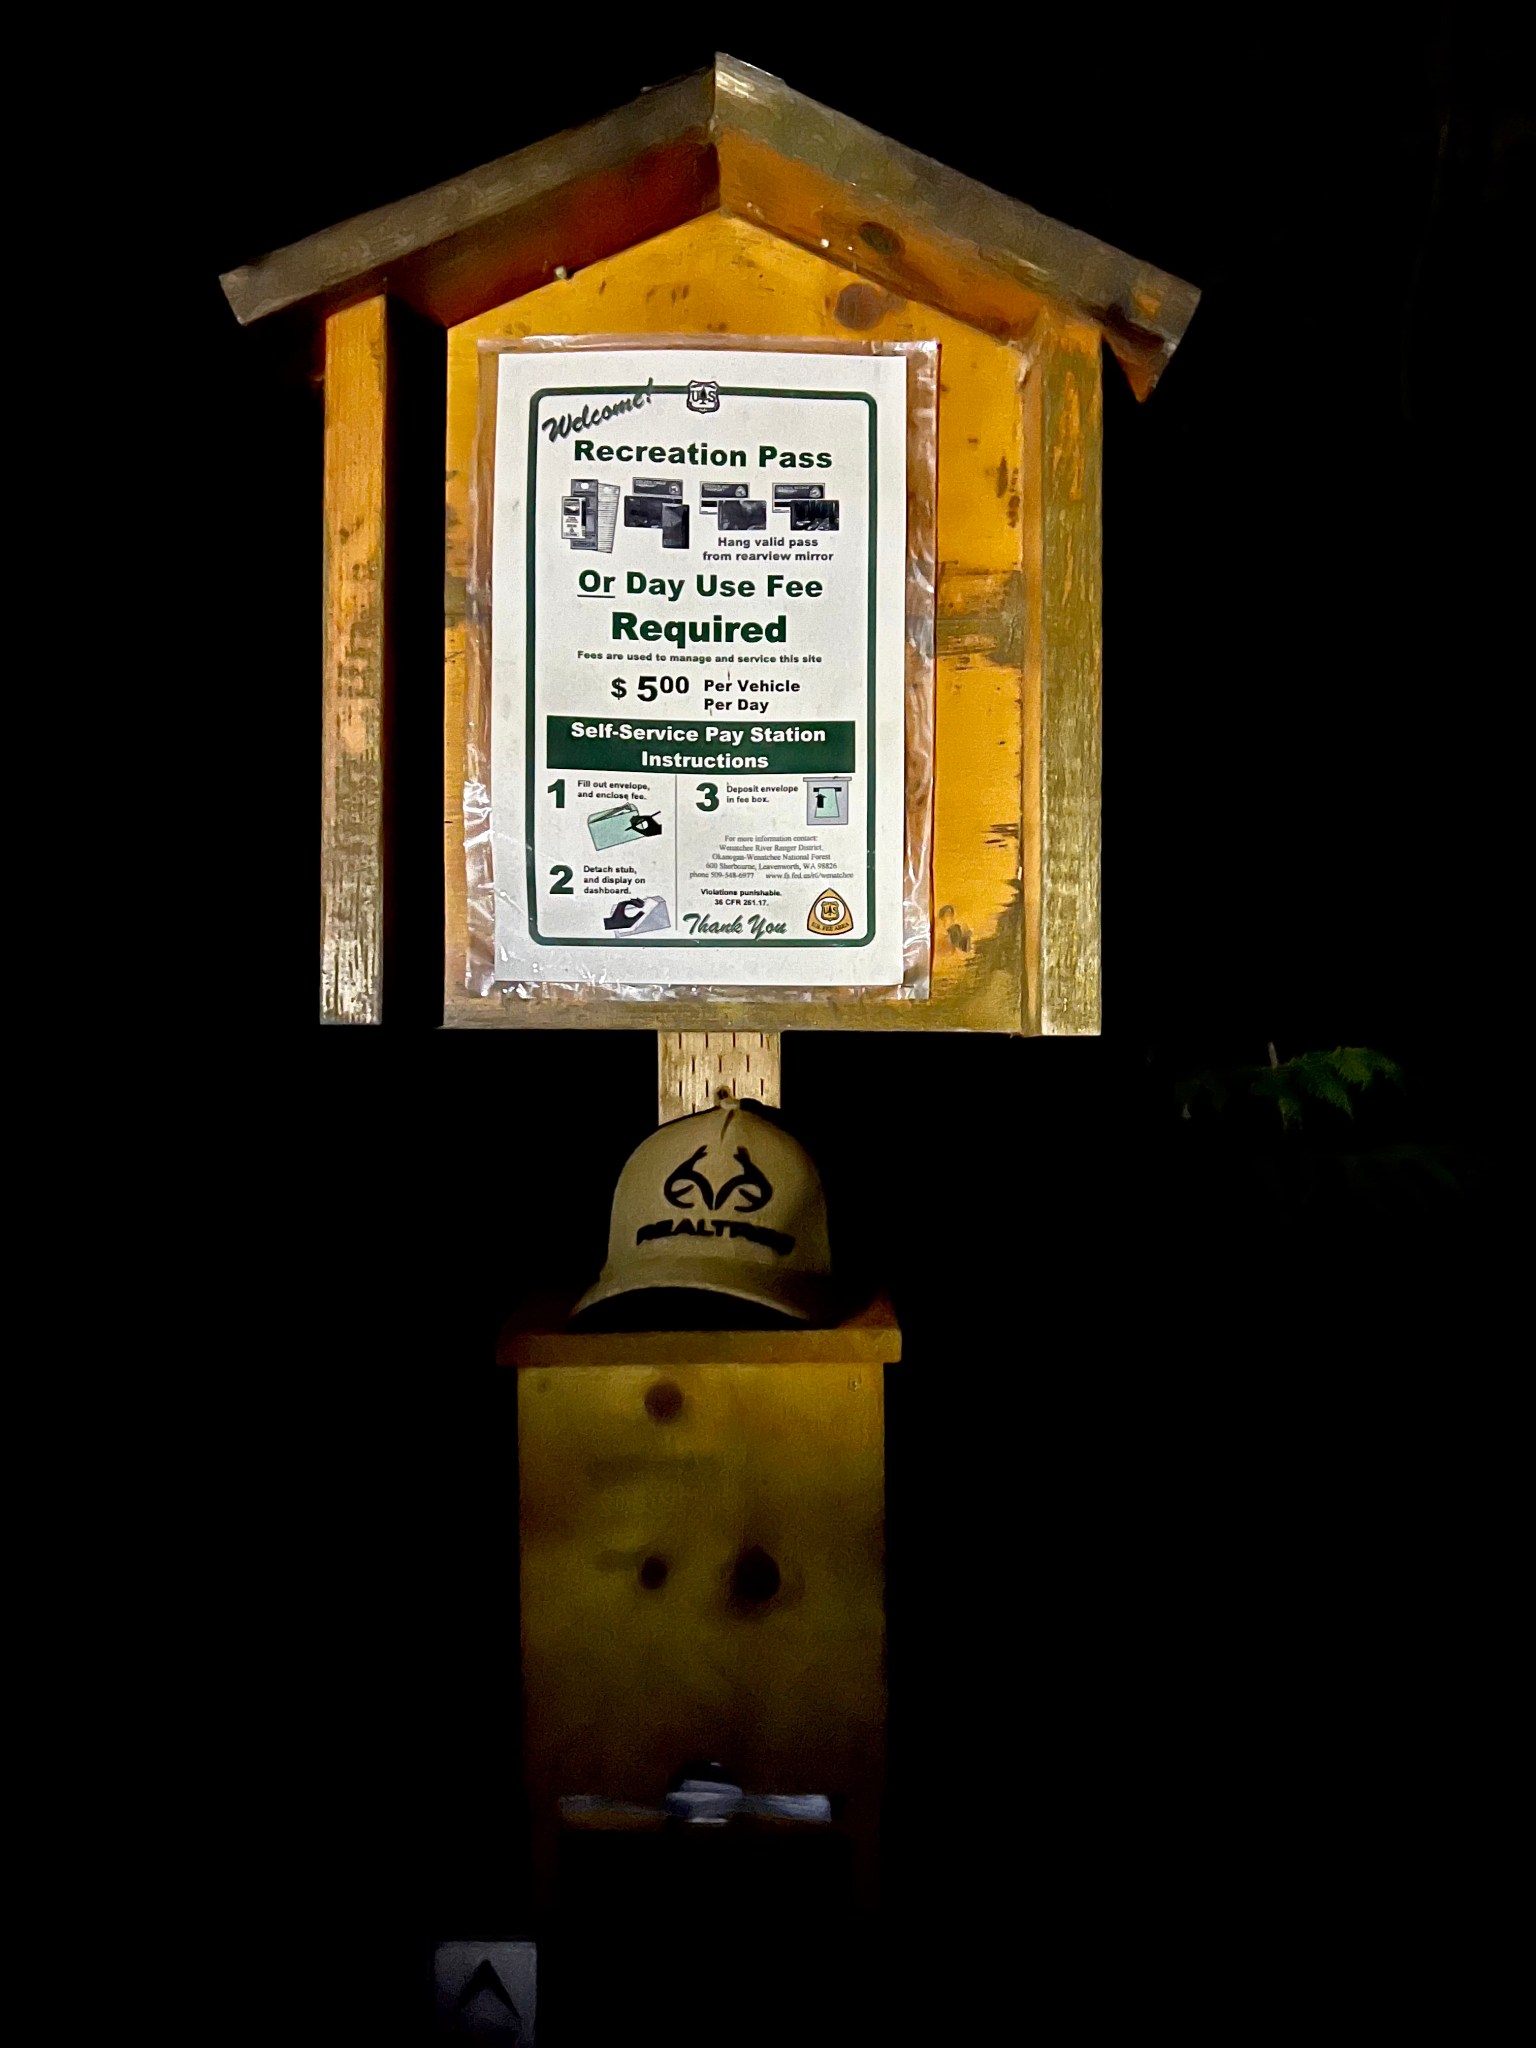
Through hike – The Enchantments trail can be hiked as a very long day hike. Those who are unable to apply for or secure camping permits months in advance choose this option. Permits are required for Day Hiking the Enchantments. Day Passes ($5 per vehicle) can be purchased at trailhead, and pass must be displayed on dashboard of vehicle, even if parking on the road. If you have America the Beautiful Pass, you don’t need purchase the day pass. Learn more details here.
Backpack – We highly recommend spending at least a night camping in the Core Enchantments Zone. This will elevate the entire experience by a notch and allow you soak in the views instead of having to rush through the trail. Read on to find out details about the Permit process and everything you need to know before backpacking the Enchantments.
The Enchantments Zone, Trail Map
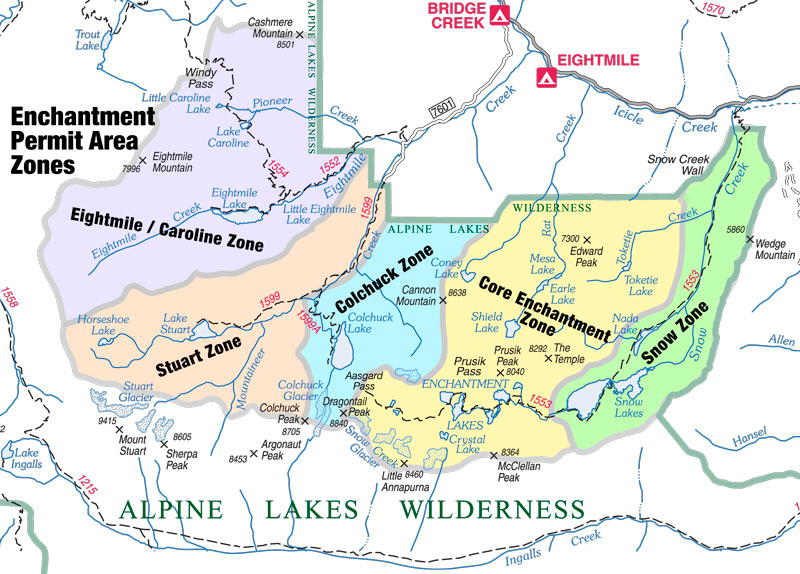
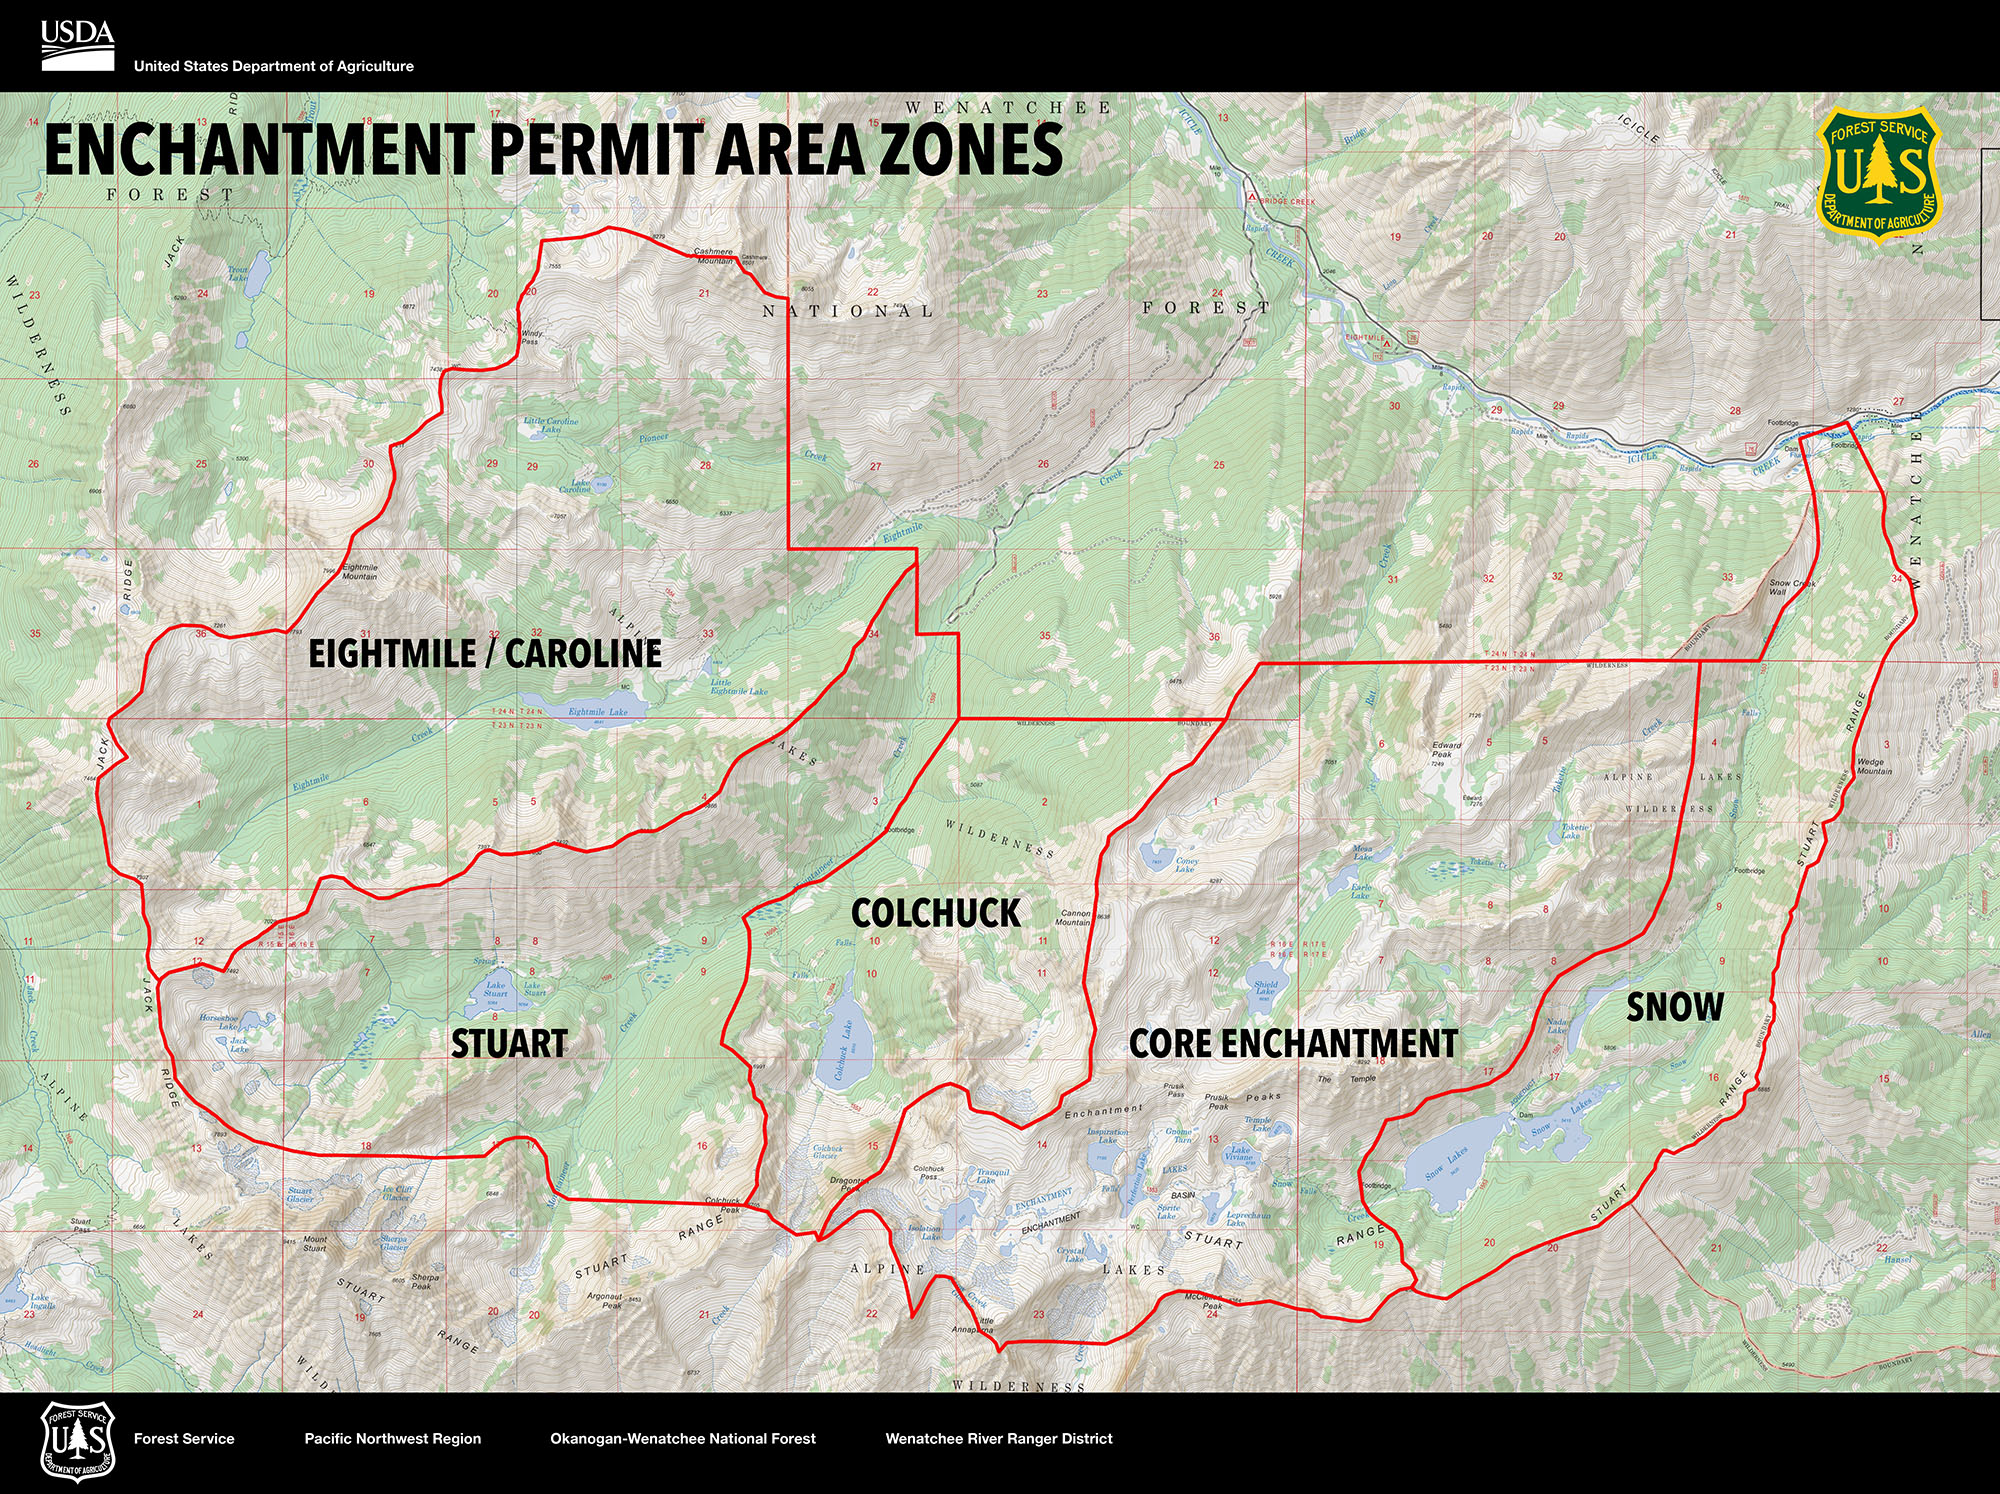
Map of the Enchantments Zones & trail showing Snow lake, Core Enchantments, Colchuck, Stuart & Eightmile areas. Source: fs.usda.gov
The Enchantments Hike Stats
The route stats shown below is the most popular way of hiking this trail mainly because it is more efficient in terms of effort, elevation gain/loss and the quality of experience in general.
Start of trail: Stuart Lake Trailhead
End of trail : Snow Lake Trailhead
Trail length: ~21 miles
Type of trail: Point to Point
Elevation gain: 5500ft (when hiking into the Core Zone)
Elevation loss: 7800ft (when hiking out of Snow Lake Zone)
Difficulty: Very Strenuous
Note: There is a Leavenworth-based shuttle service that can be booked in advance to transport you back to Stuart lake trailhead after ending hike at Snow lake trailhead. Other options are either hitchhike back, although slightly risky, it works. Or have cars parked at each of the trailheads. You could consider renting a car to accomplish this.
Alternate Route Options
Roundtrip hike starting and ending at Stuart Lake Trailhead – Although this option avoids having to deal with the logistics of starting and ending at different trailheads, the downside is hiking down Aasgard Pass. Elevation loss of 2200ft in less than a mile could be brutal on the knees.
Point to point hike but starting at Snow Lake Trailhead and ending at Stuart Lake trailhead – The downside of this route is that it adds an elevation gain of over 2000ft to your hike. Similar to the previous route, climbing down Aasgard Pass could be brutal on the knees.
Permits for Backpacking the Enchantments Trail
Permits are required to camp in any of the five zones between May 15 – October 31. Overnight camping permits can be obtained via an online lottery draw that is held between Feb 15 – March 1st. Lottery opens 7:00 am PST on Feb 15th and closes on March 1st 11:59 pm PST. All details about how the lottery system works, do’s and don’ts when applying for a permit, chances of getting a permit etc. can be found here.
To apply for an overnight camping permit create an account at recreation.gov. Make sure to go through all the valuable information on this site before applying for a permit. An Overnight Visitor Parking Pass is required to park at all Enchantment trailheads and are free with the purchase of an overnight camping permit.
Note: For vehicles parking on road or in parking area — a NW Forest Pass, America the Beautiful Pass or the Overnight Visitor Parking Pass that comes with Enchantments overnight permit must be on display on your vehicle’s dashboard
Backpacking the Enchantments Trail – Our Experience
We had a 1-night permit to camp at the Core zone of the Enchantments Trail on September 20th. We drove to Leavenworth the previous evening from Redmond, WA and were on our way to Stuart Lake trailhead by 4:00 am. The last 2 miles of the drive is a dirt road and took us about an hour to get to the trailhead from the town of Leavenworth in a non 4×4 vehicle.
At the Stuart lake trailhead there is a signpost (bottom left image) where a fee payment of $5 per vehicle will need to be made if you don’t already have a recreation pass or a camping permit. A copy of the camping permit/recreation pass/receipt from paying the fee needs to be displayed on the vehicle’s dashboard.
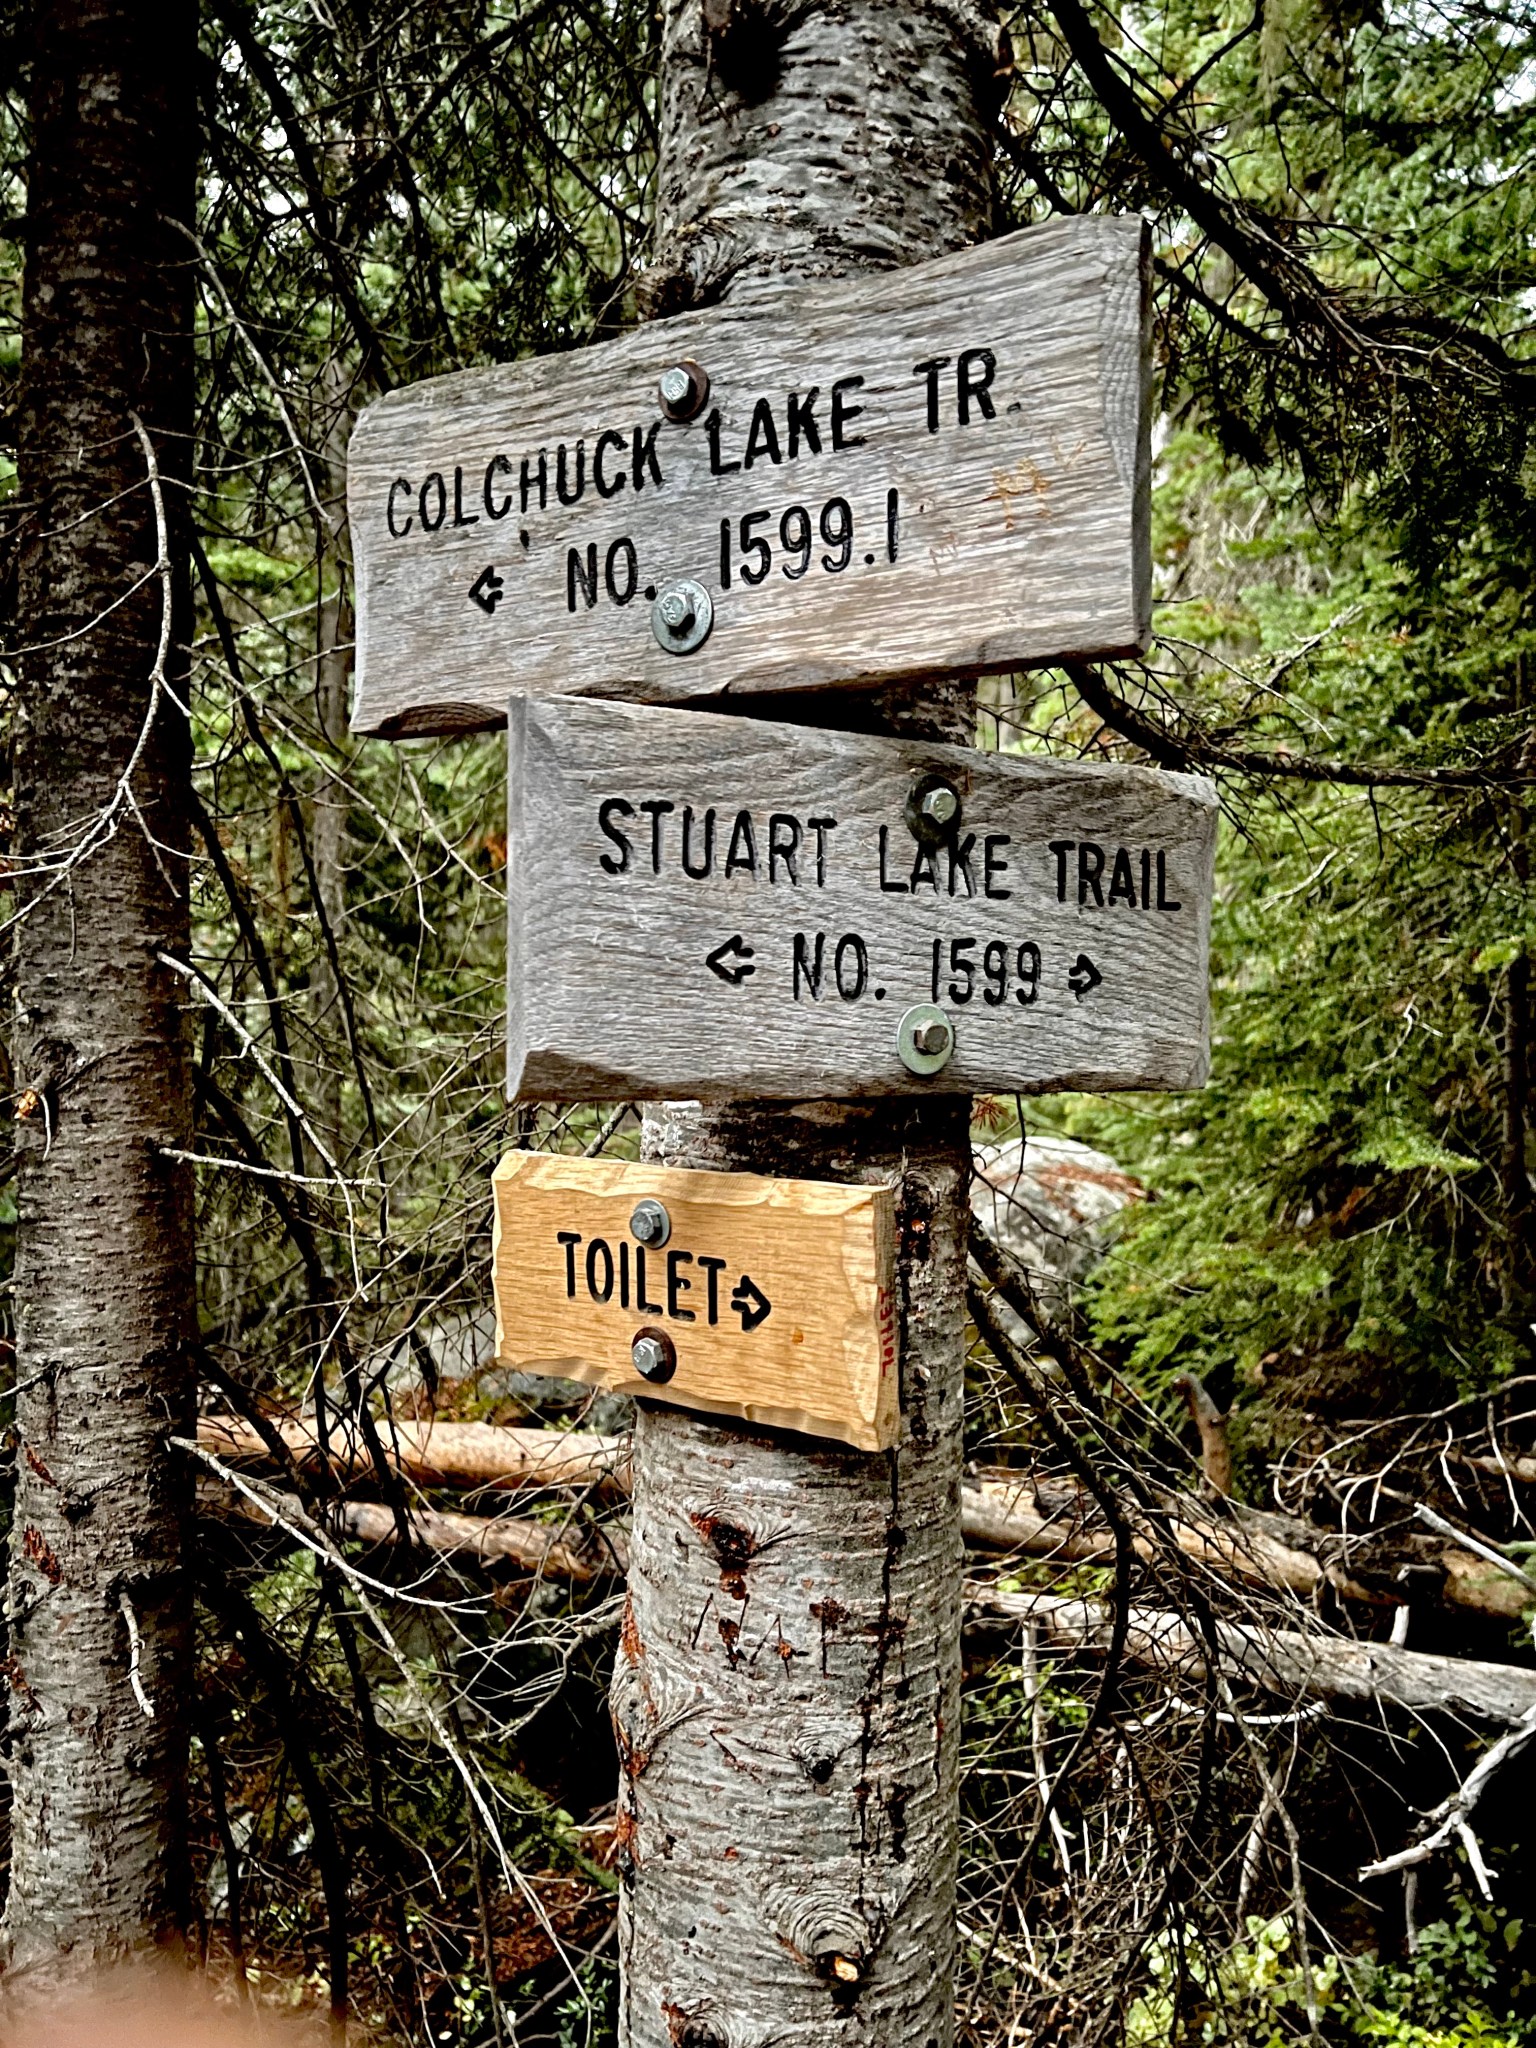
We set out on the trail with our headlamps on as it was still dark. Our first stop was going to be Colchuck lake. A little over two miles into the hike there comes a junction where the right fork leads to Stuart lake and the left one goes to Colchuck (top right image).
Until this junction the climb is gradual through a forest with a stream flowing close to the trail. Upon taking the left fork towards Colchuck, the trail starts becoming rocky with some sections having boulders that need to be navigated cautiously. Keep in mind that this section is only really a primer to what comes next. As we inched close, the tree line started giving way to the stunning icy blue water on the lake. Although we were each carrying a 25-pound backpack, we did not feel any of the strain, thanks to the crisp early morning breeze.
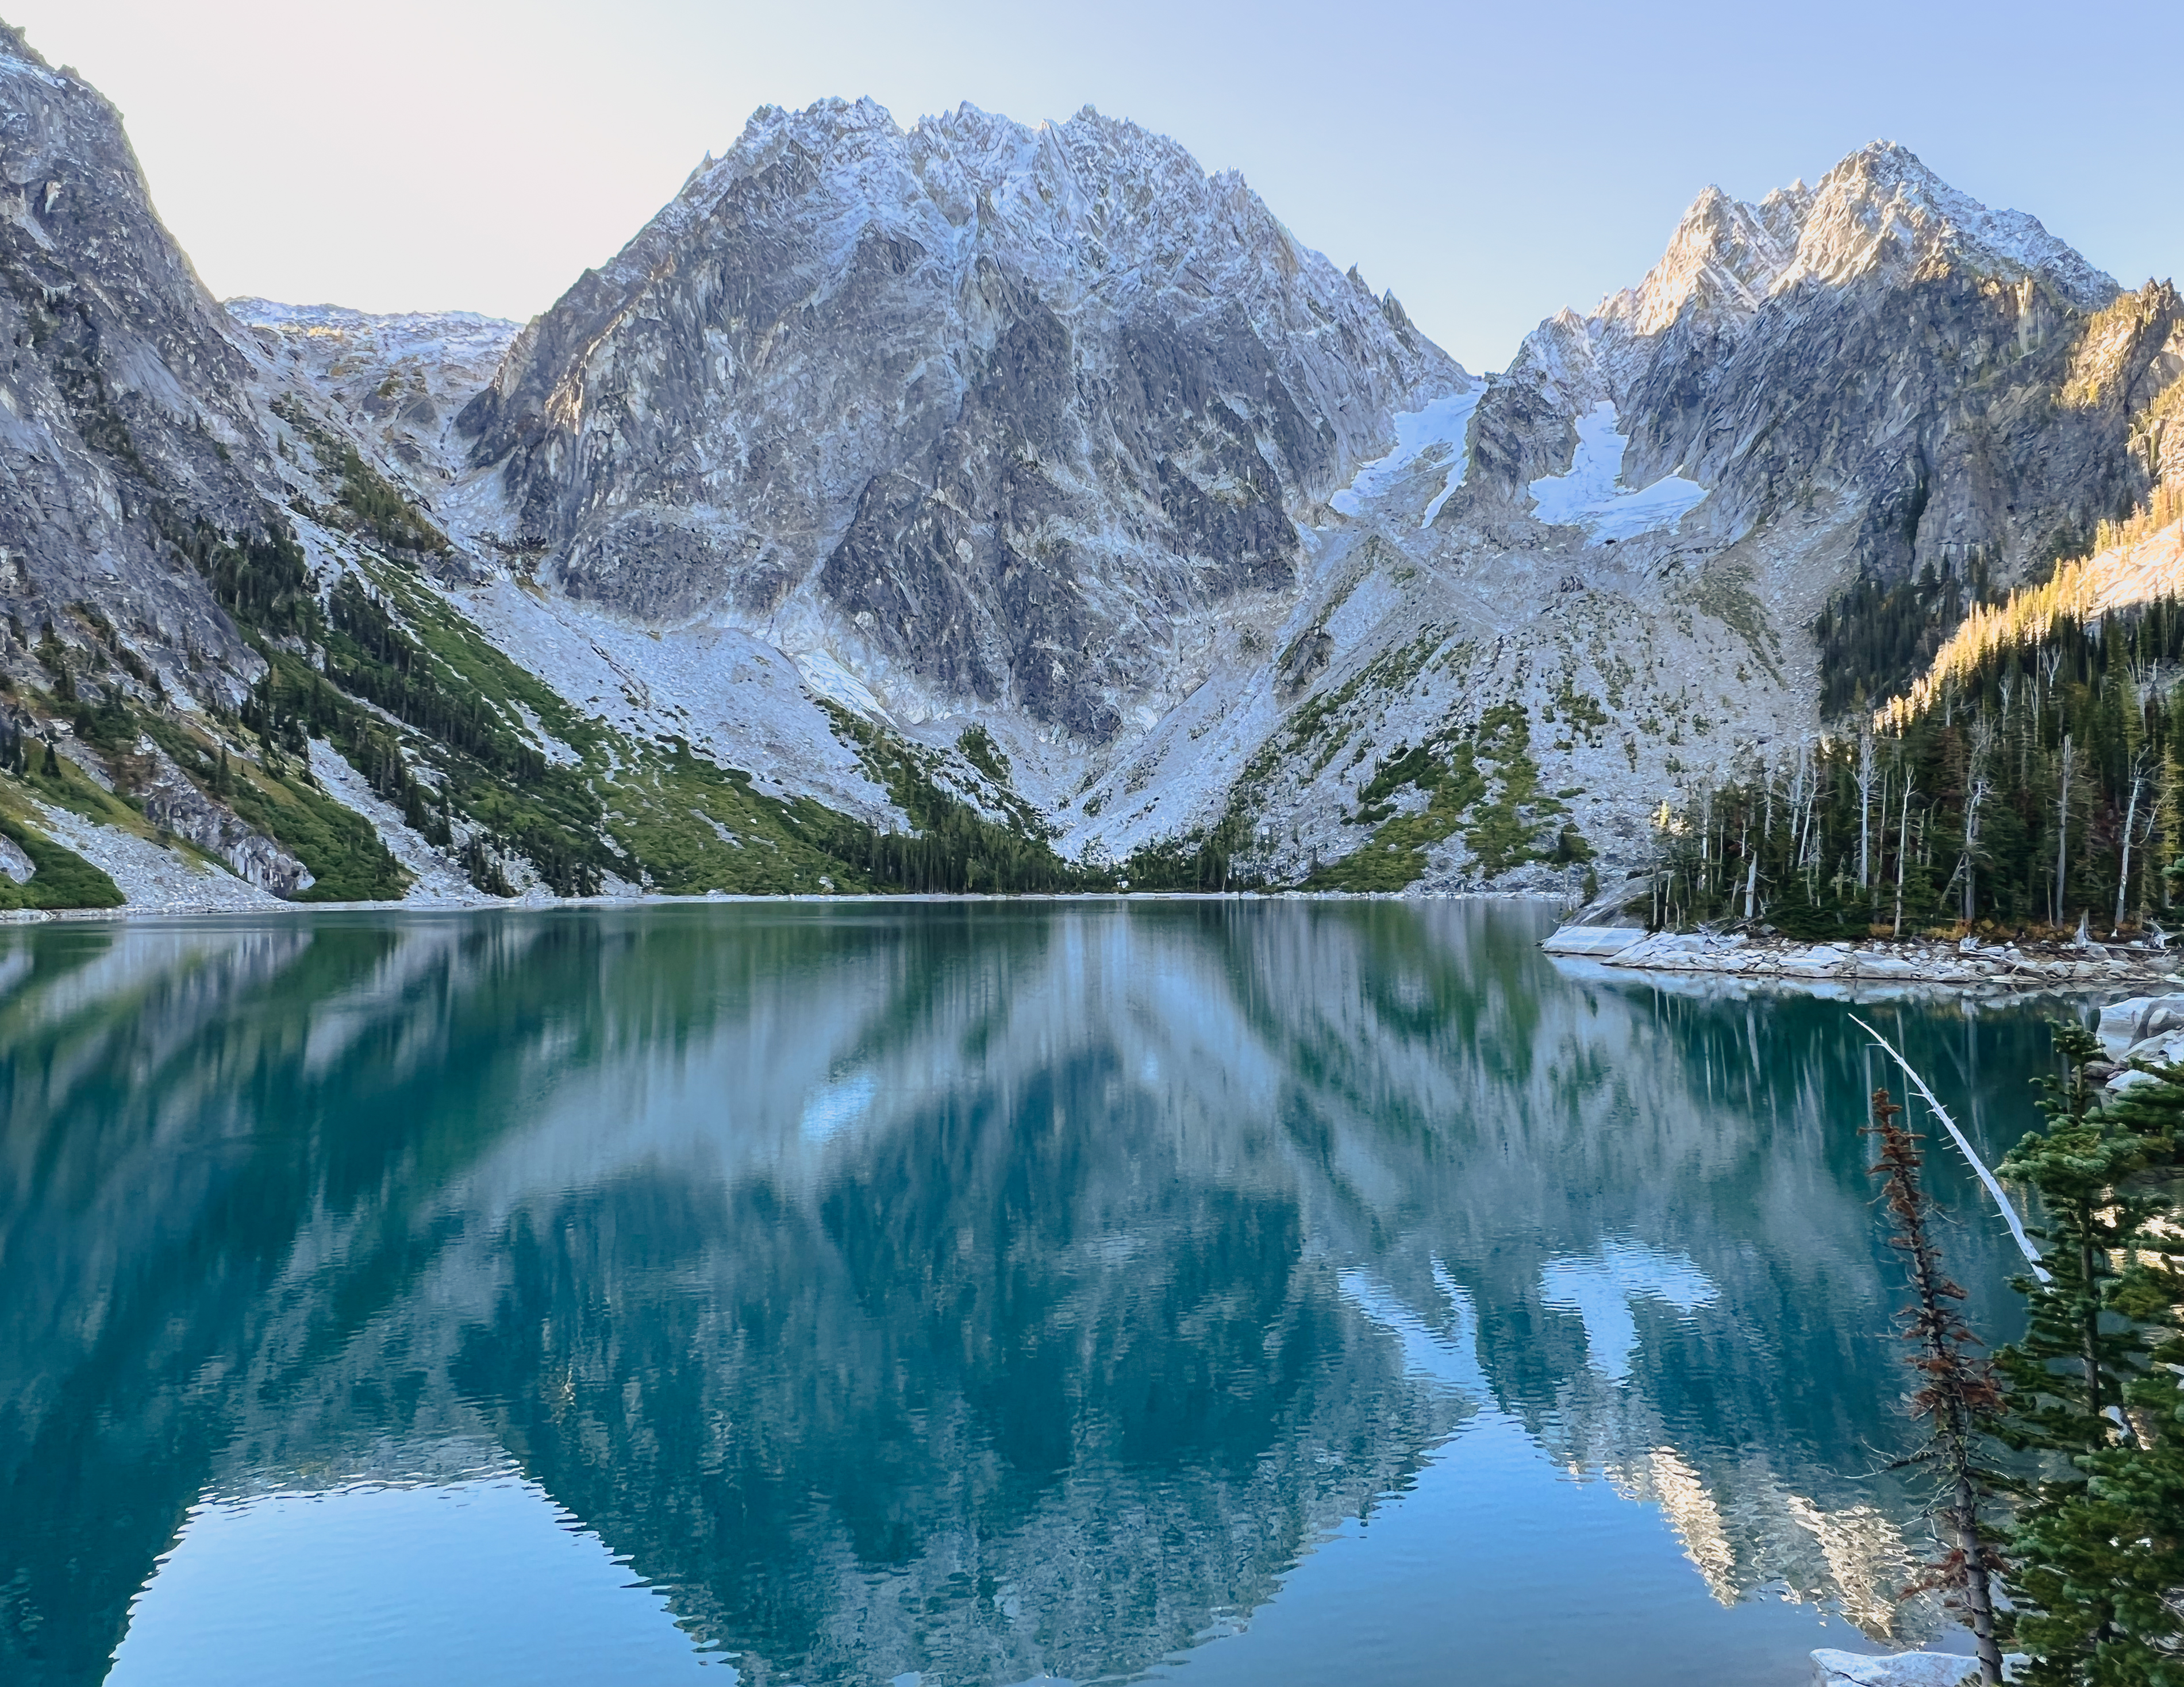
We made our way down to the lake for a quick refreshment and that’s when we really noticed Aasgard pass. From the shores of Colchuck lake the gradient on Aasgard does seem intimidating to say the least and the thought of turning back did cross our minds. But all the built up excitement from the time we scored a permit to this point was strong enough to keep us going. This is also a good time to replenish water bottles/bags from the lake but do remember to carry and use water filters.
There are quite a few campsites around the lake for those backpackers carrying a camping permit for Colchuck lake.
Stats
Elevation gain: ~ 2300 ft
Distance: ~ 4 miles
Start: Stuart/Colchuck lakes trailhead
End: First views of Colchuck lake
Difficulty: Moderate
After admiring views of Colchuck and the reflections of Dragontail peak in the lake, we made a move towards the base of Aasgard pass. To get to Aasgard pass we had to walk along the lake in a counter clockwise direction. This section is mostly flat but there is a big rocky stretch with boulders throughout. There is no clear trail as such but there are rock cairns which are easy to go out of sight. But the idea is to head in the direction of Aasgard Pass (which will mostly be in sight) and not rush the boulders.
Stats
Elevation gain: Relatively flat
Distance: ~1.25 miles
Start: First views of Colchuck lake
End: Base of Aasgard pass
Difficulty: Easy except for the boulder hopping part
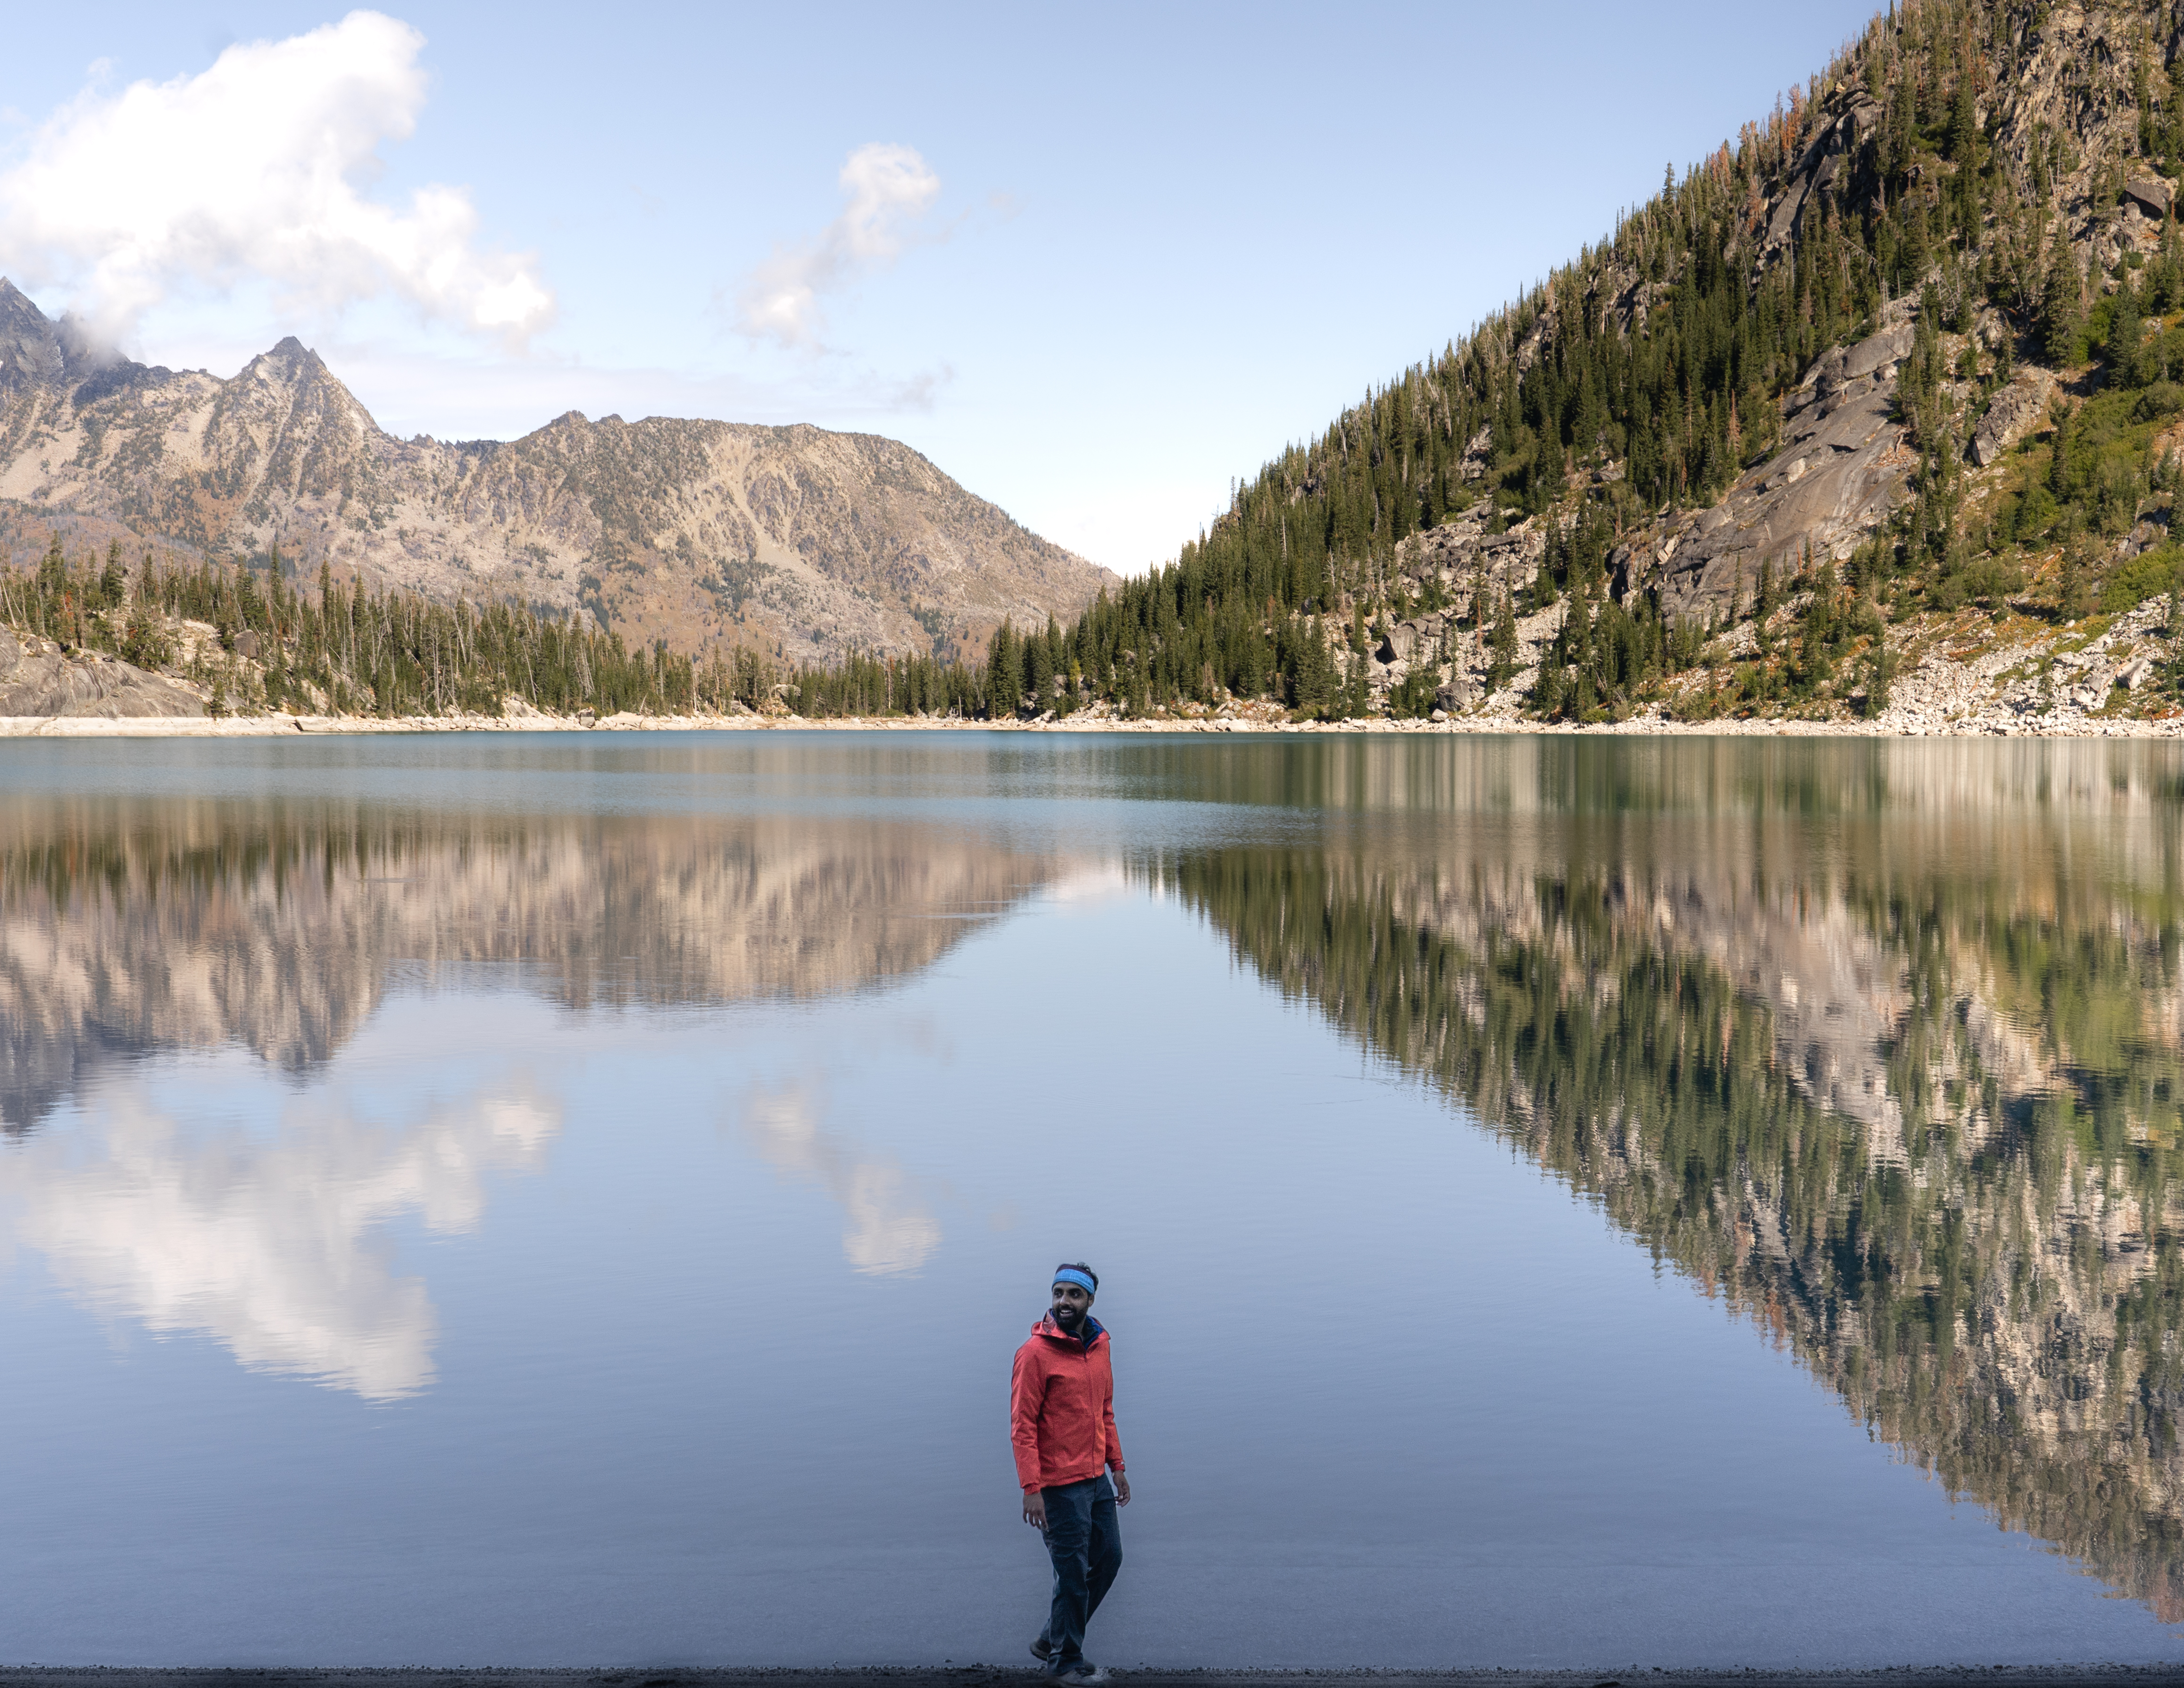
Just before starting off on the uphill trek, we took a small detour on the left that leads to a little beach for one last close up view of Colchuck lake that has crystal clear reflections of the surrounding peaks.
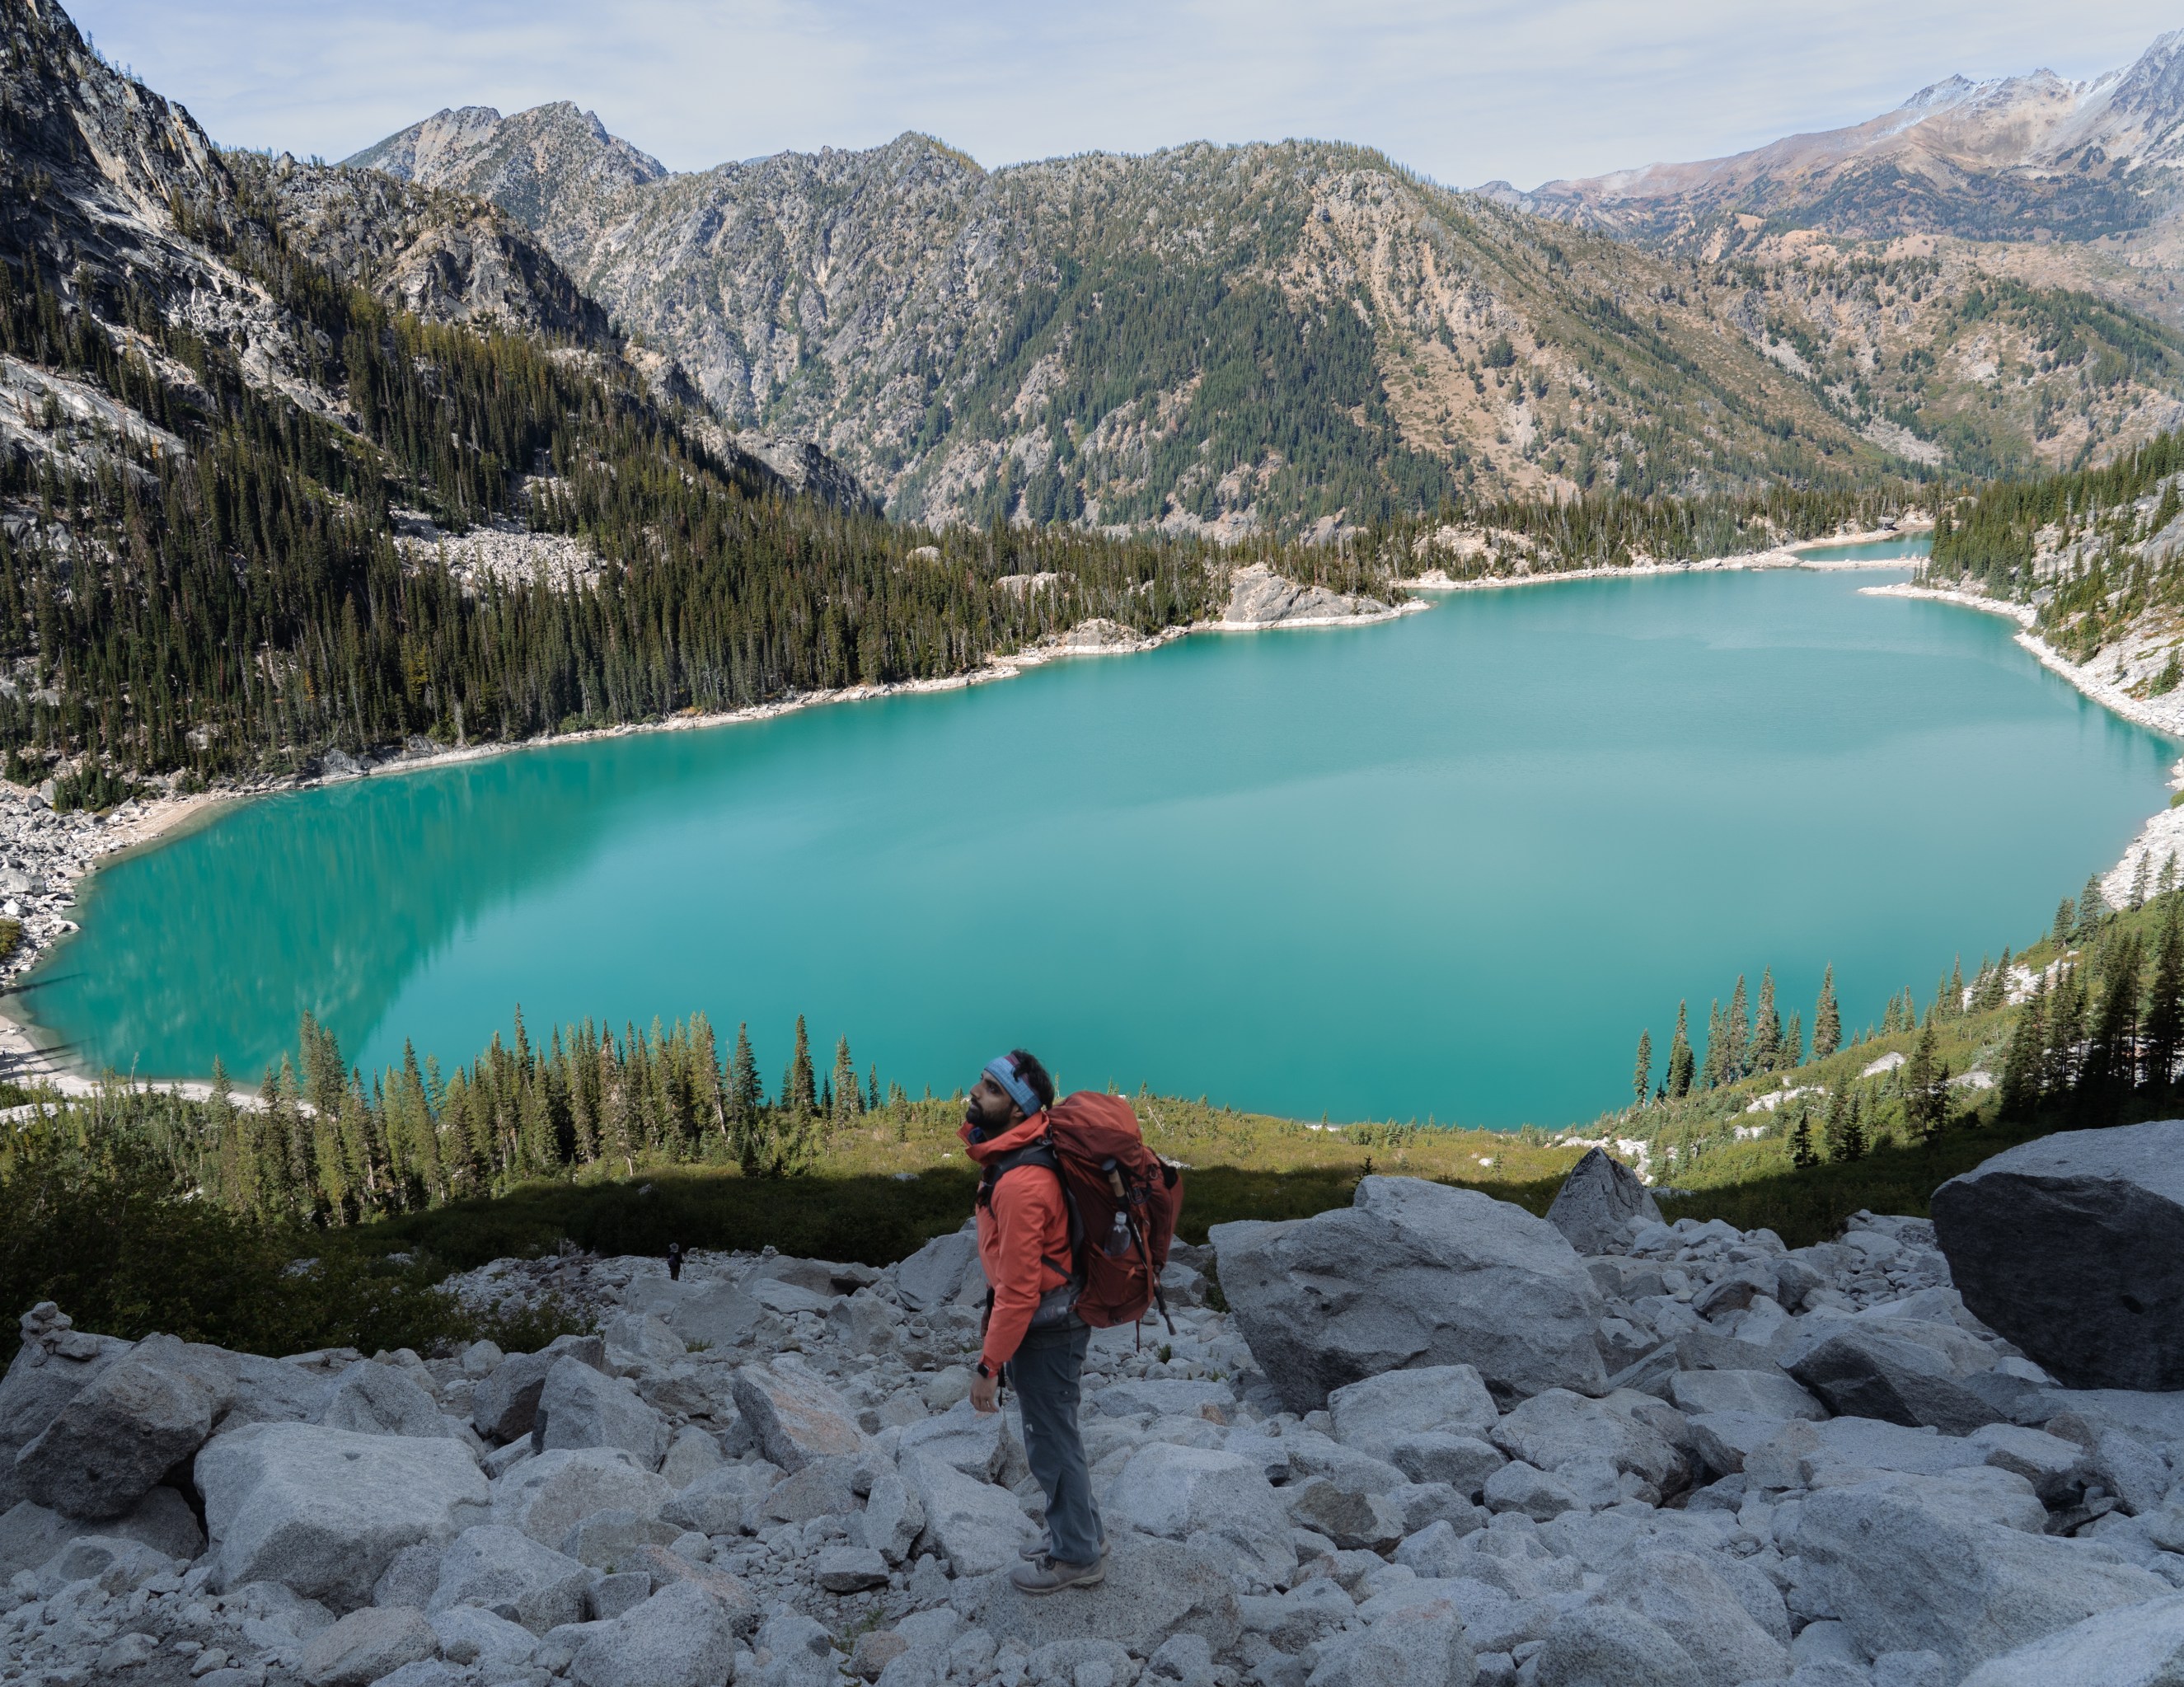
The terrain climbing up Aasgard Pass is mostly loose rock and gravel and at higher elevations there are boulders too. The ascent is steady, steep and arduous but the increasingly beautiful views of Colchuck lake below serve as a mighty respite. There are rock cairns throughout the pass and it is important to take the time to follow them and stay to the left of the groove of trees (away from the waterfall on the right). There are quite a few false peaks – ones that give you an illusion of having reached the summit but it’s only when you get there do you see that there is more to climb.
Stats
Elevation gain: ~2200 ft
Distance: less than mile
Start: Base of Aasgard pass
End: Core Enchantment basin
Difficulty: Strenuous
With a slow and steady pace and after having every ounce of endurance tested, especially for those carrying heavy backpacks with overnight gear, Aasgard does end! It flattens out into the basin of Core Enchantments zone and there on starts a series of lakes, scattered throughout an ethereal landscape, each one donning a unique shade of blue-green.
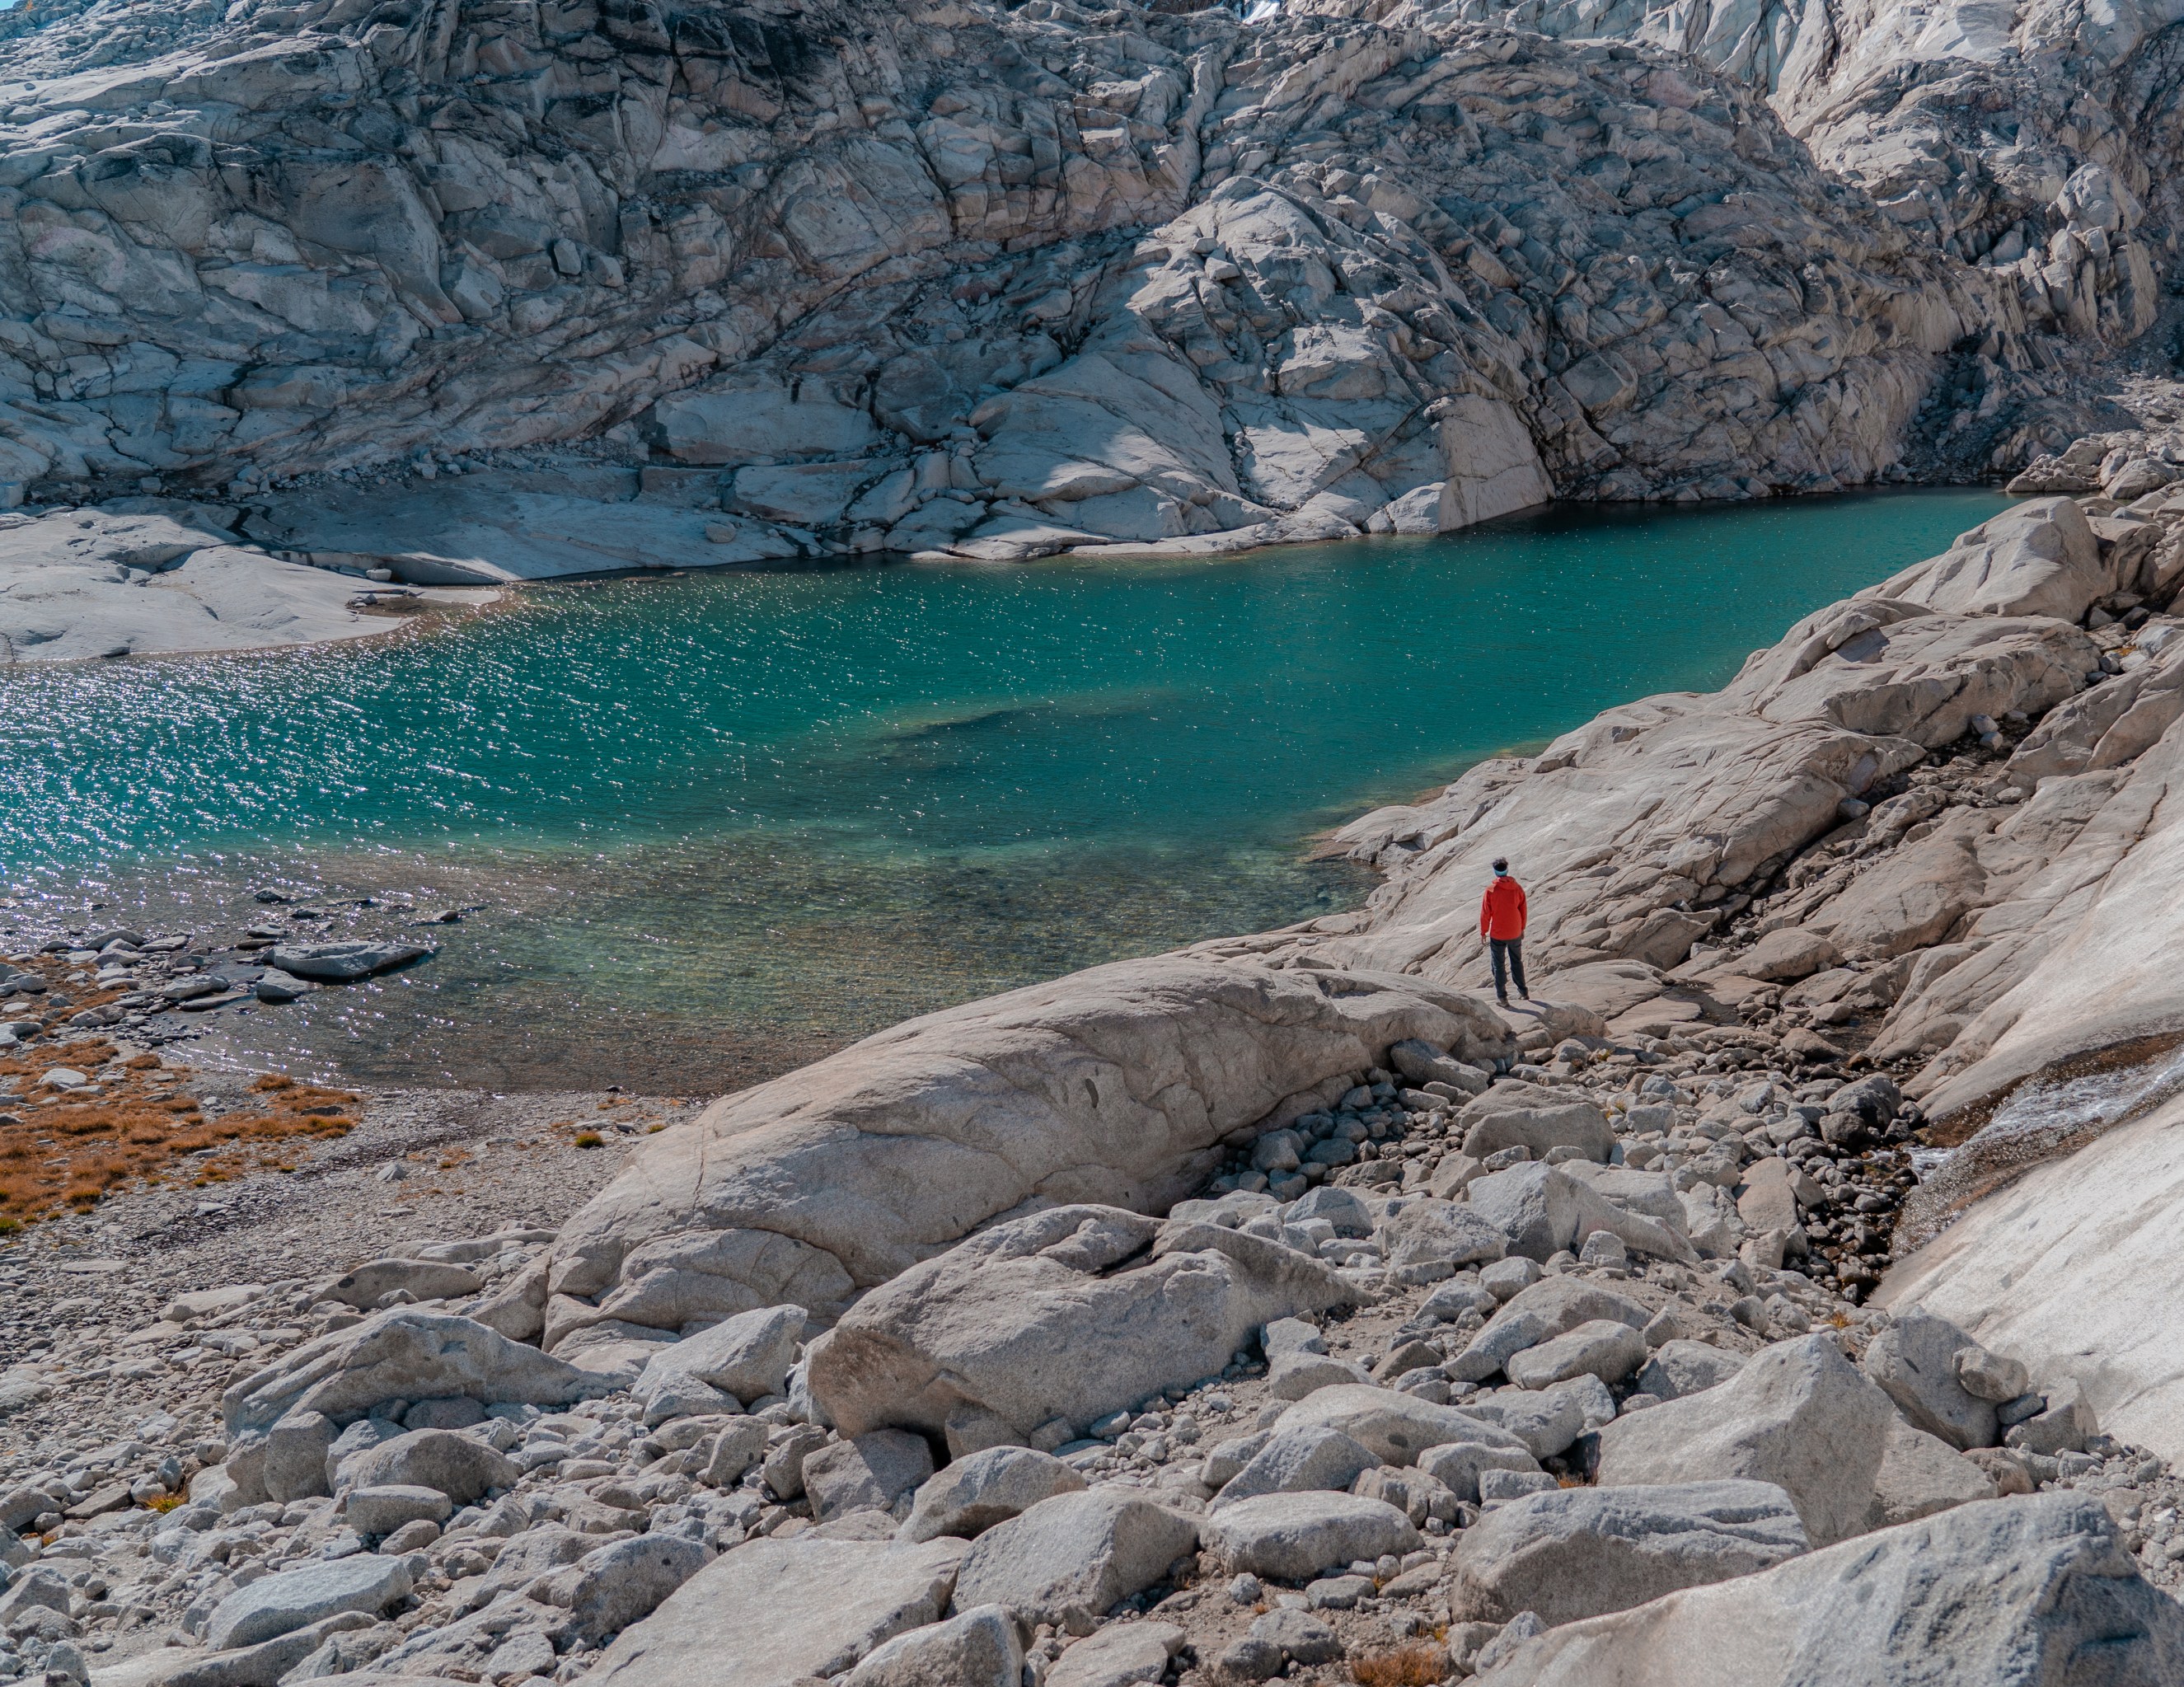
At this point it only seemed right to run to every corner of this rugged moonscape that sprawled ahead of us and soak in the beauty of it. But we were exhausted from the climb and our backpacks were really starting to weigh us down so we decided to setup camp instead. We camped at Isolation lake which is the second one in the Core zone. But if you are able to hike further, we highly recommend camping at Inspiration, Perfection or Sprite lakes where you start to see larches and lush alpine meadows. A map of the Core Zone and the names of lakes can be found here.
There are no designated campsites but it is not hard to locate an already established one. They are typically located on flat land and either have rocks encircling the campsite or piled up to make windbreakers. It is best to reuse campsites and not make new ones to avoid further damage to the delicate ecosystem.
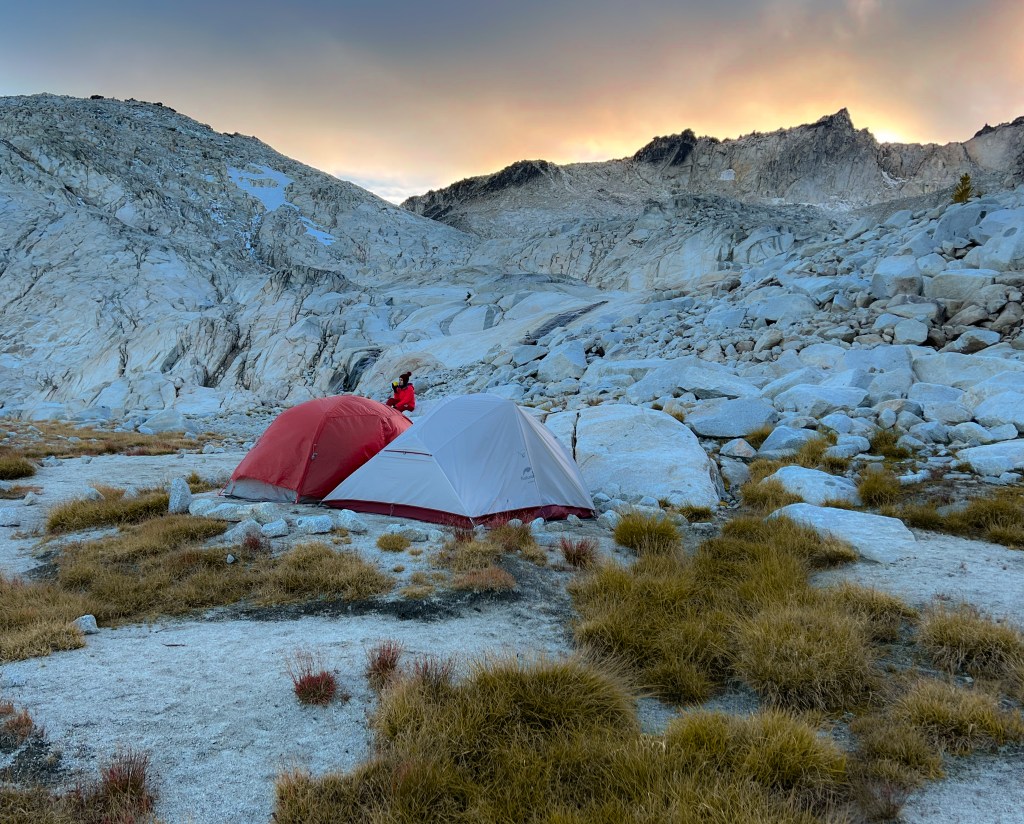
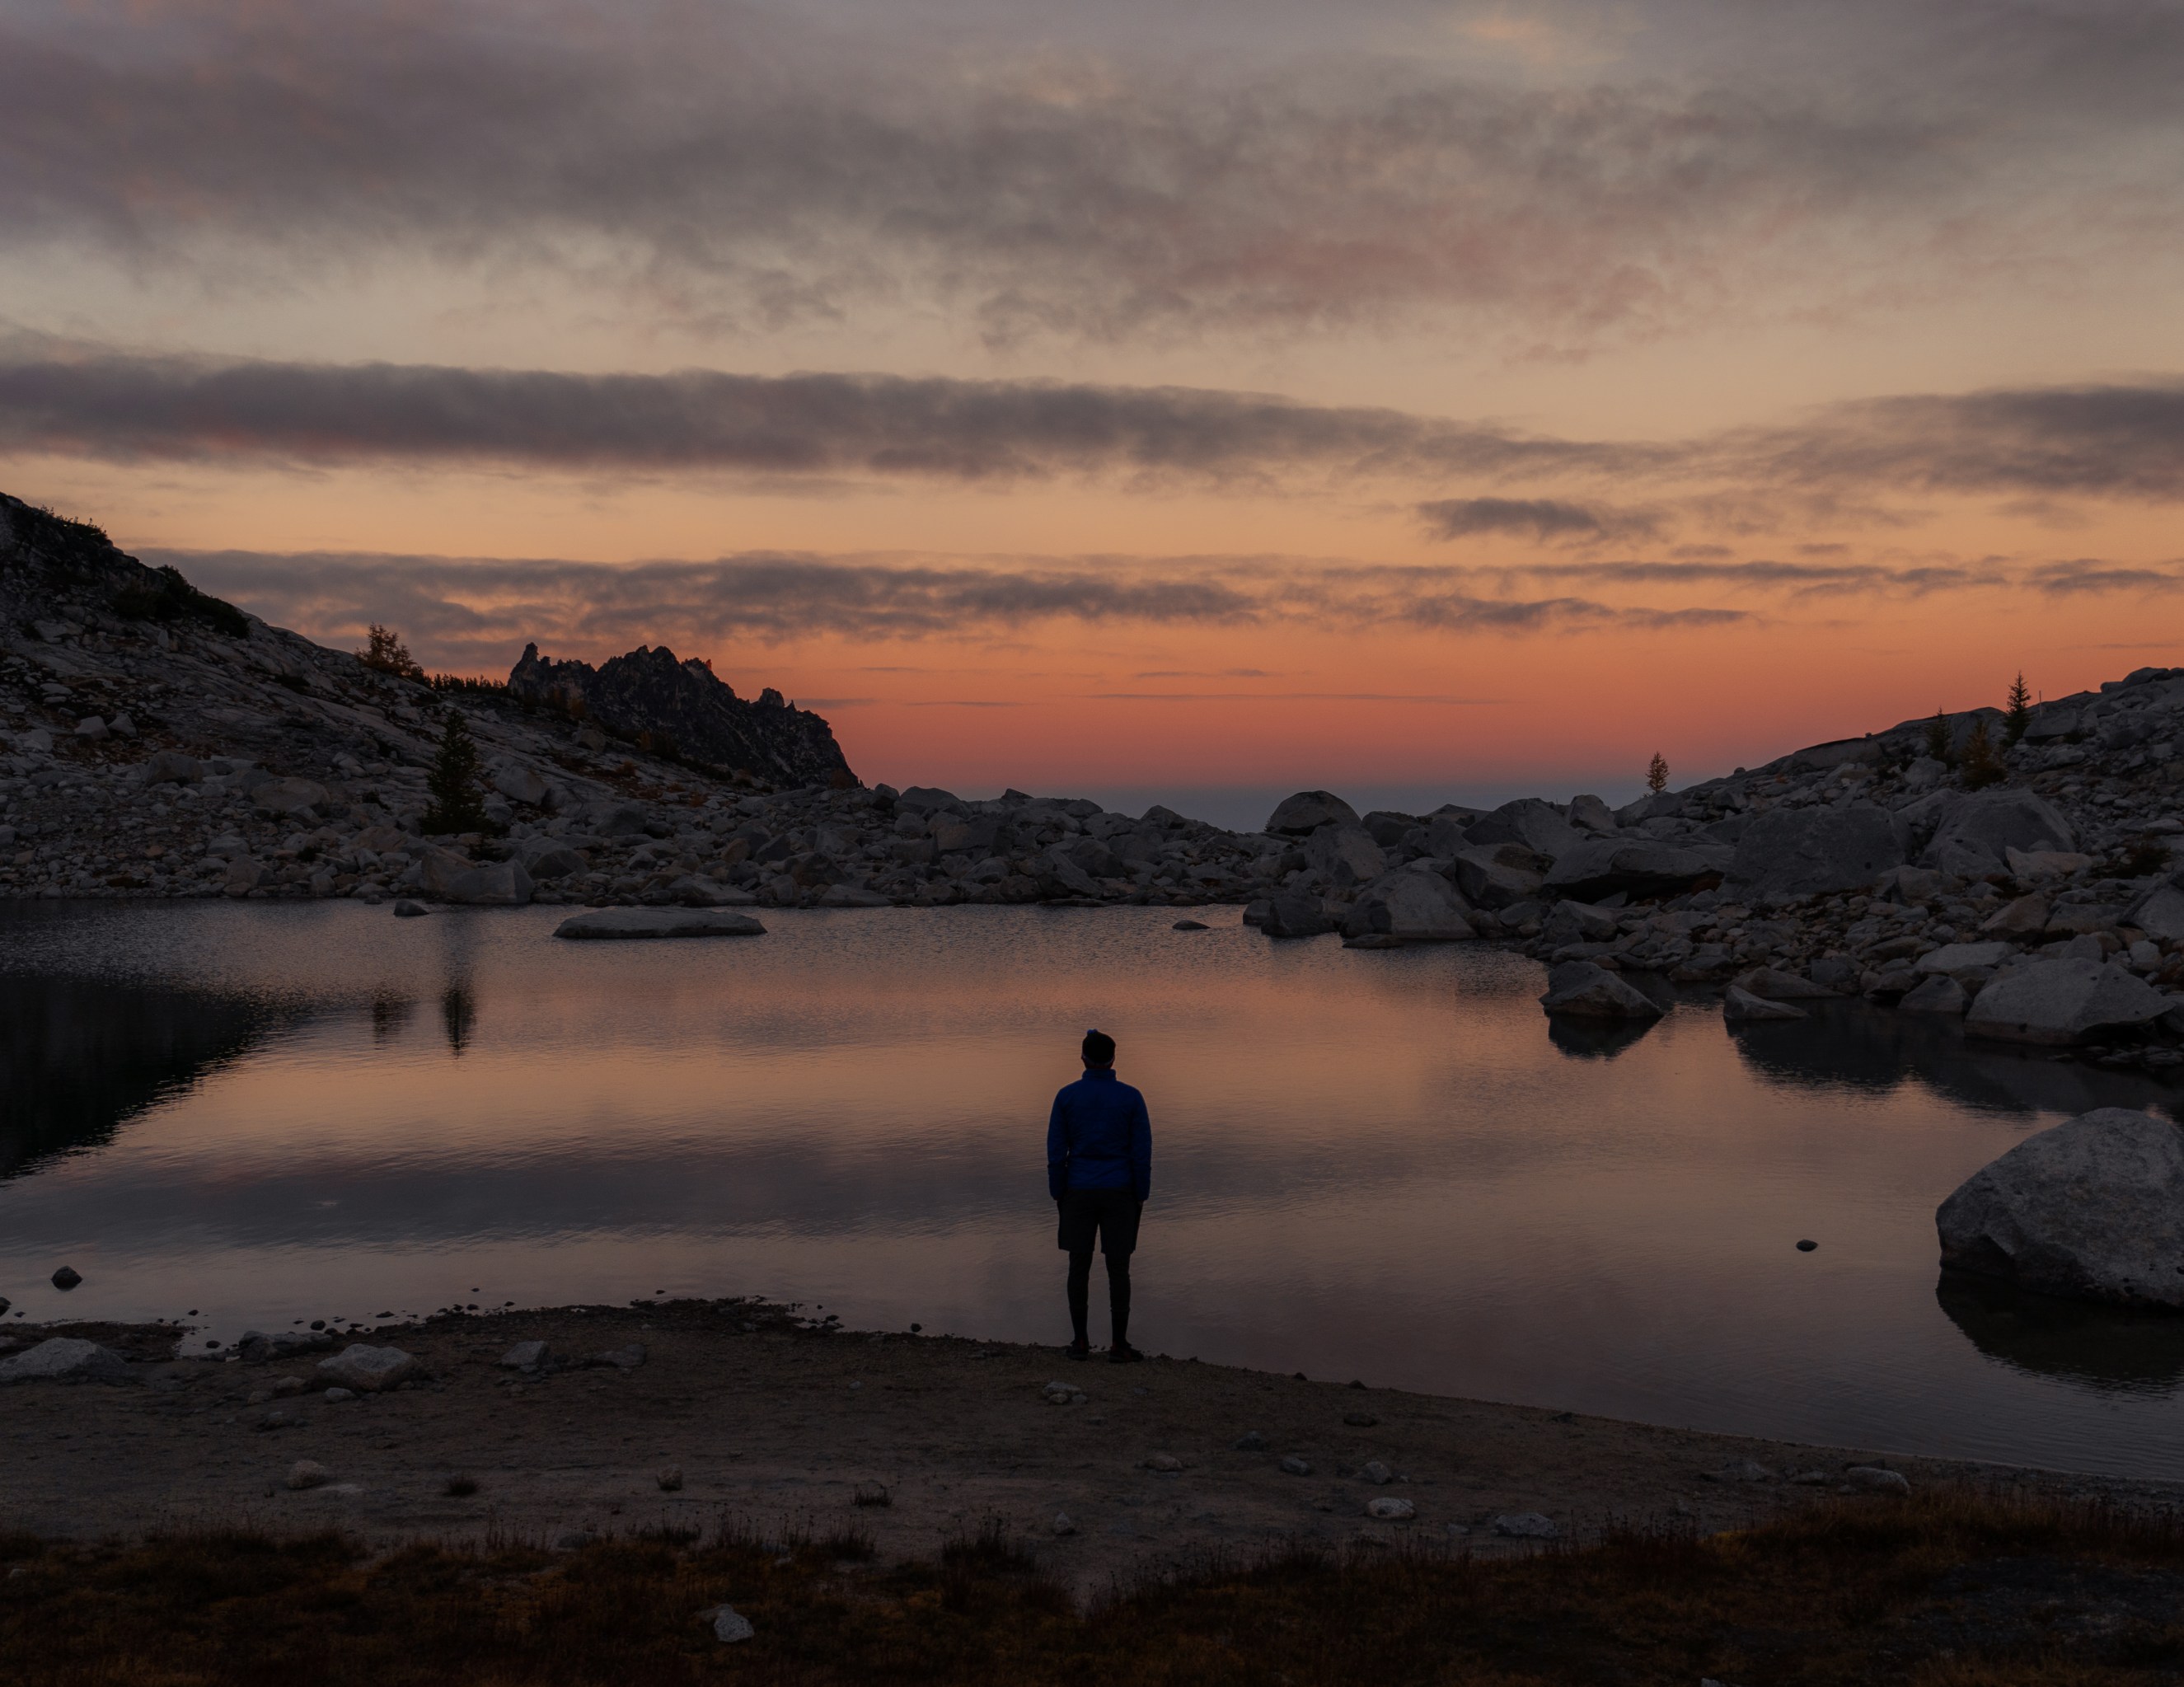
The decision of breaking at Isolation lake turned out to be a good one for us as we got enough time to set up camp and experience a beautiful sunset. It got super chilly and windy soon after sun down so much so that the outer layers of our tents kept flapping throughout the night. Our hand and feet warmers helped us get some much needed sleep.
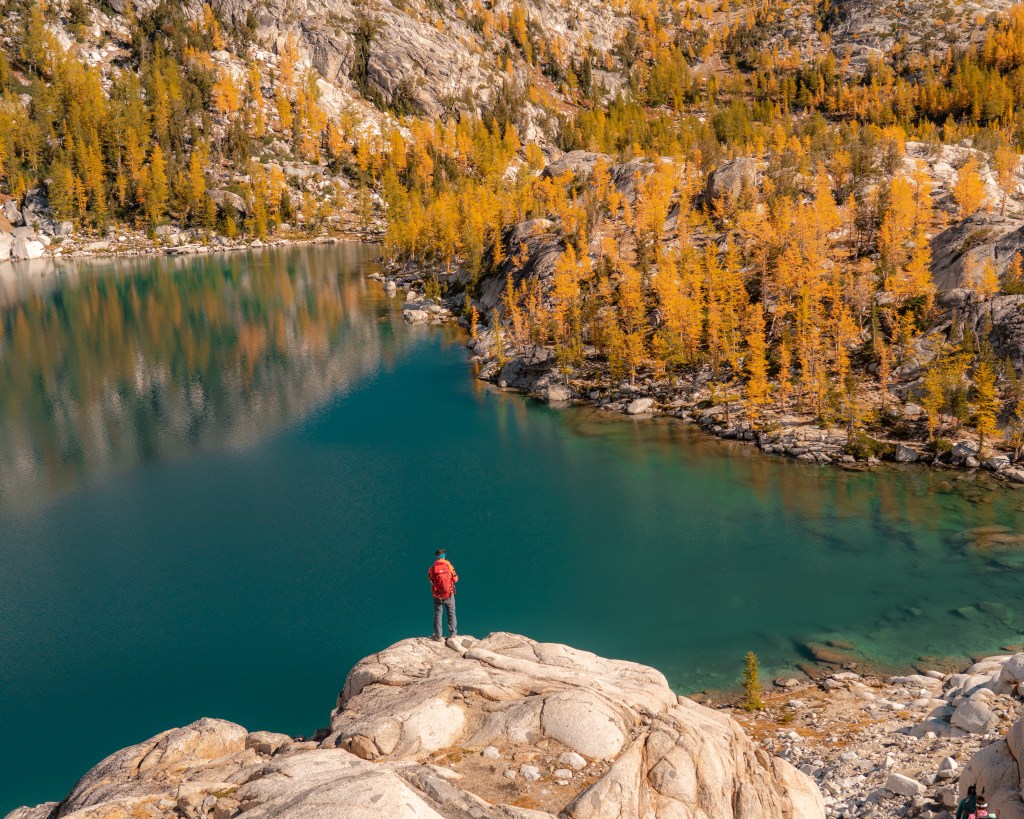
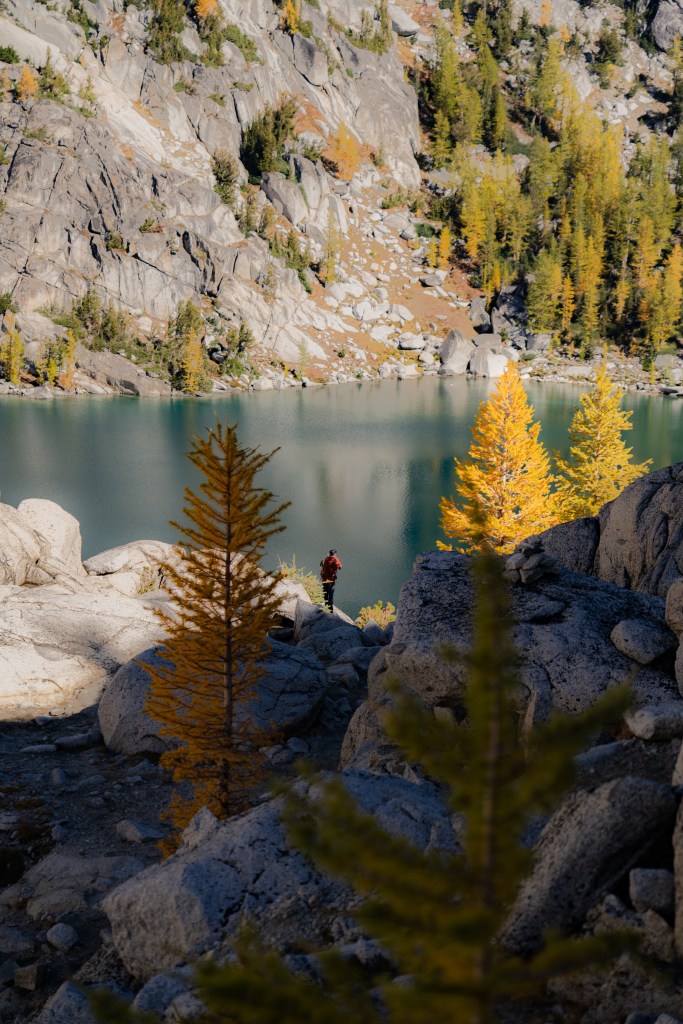
The next morning we were packed up and ready to explore the heart of the Enchantments Trail by 9 am. The sight of numerous little alpine lakes lined with larches is a treat to the eyes – especially in the small window between late September and mid October when the larches start to turn yellow. There is so much beauty packed in this small region that it is easy to lose track of time which almost happened to us and we ended up hiking the last few miles in the dark so we suggest planning your time in the Core zone accordingly.

The rest of the hike is more or less all downhill but by no means easy and although there is no well defined trail, there are rock cairns placed throughout this region that are easy to identify and follow.
Stats
Elevation loss: ~1000 ft
Distance: 3 miles
Start: Isolation lake
End: Lake Viviane
Difficulty: Easy
Lake Viviane is one of larger lakes that marks the end of the Core zone. We refilled our water bags here and took a short snack break before heading down into the Snow zone. There is significant elevation loss within a short distance through the next stretch leading to Snow lakes. Some sections required maneuvering on all fours. Following rock cairns should help in keeping off slippery sections for the most part.
Stats
Elevation loss: ~1400 ft
Distance: 1.5 miles
Start: Lake Viviane
End: Snow lake
Difficulty: Difficult
There are several campsites at upper snow lakes, for those with permits to camp in the snow zone. We rested a little bit before making the descent down to Nada lake. This section of the trail is well marked and easy to follow, has loose rock and gravel but not many big drops or boulders.
The hike down from Snow lake to the parking lot seemed never ending and the views along the trail don’t have much to offer except for a quick look at Nada lake. Half way through this section we had to turn our headlamps on as the light was dwindling and we were glad to have put the boulder section behind us before dark. We mostly hustled through this stretch looking forward to finally ending the toll on the knees and toes from the constant descent. As days get shorter in the months of September and October, hiking back in the dark may become inevitable but is not so bad once past Snow lakes and can be safely hiked with the help of a headlamp.
About 2 miles before reaching the Snow lakes trailhead, we made a call to the shuttle company that we had pre-booked to transport us to Stuart/Colchuck lake trailhead where our car was parked. The early call saves you the time of waiting for the shuttle to arrive once you have finished the hike. Despite the early call we had to wait for almost 45 minutes before the shuttle arrived.
Stats
Elevation loss: ~4200 ft
Distance: ~9 miles
Start: Snow lake
End: Snow lakes trail head
Difficulty: Difficult
General Tips for Hiking the Enchantments
- The Enchantments trail is by no means a beginner level trail and requires hikers to possess a reasonable level of physical fitness before attempting it. Being physically active in general with a regular exercise routine combined with at least two or three hikes a month should really help with developing the stamina needed for this hike. If you are looking to go an extra mile and make this an enjoyable experience, carrying additional weight in your backpack during preparatory hikes will help in building that much needed endurance.
- A general list of backpacking gear can be found here
- Carry layers as the wind and temperature could change depending on altitude and time of day. Definitely carry a rain jacket.
- Start the hike as early as possible, especially if through hiking – you could never spend enough time here.
- If feasible, try camping for at least 2 nights to be able to really explore and absorb the wealth of natural beauty this place has to offer.
- Once past Snow lakes zone, it is pretty safe to hike back in the dark with a headlamp as the trail is well defined and does not have boulders. Also the views don’t have much to offer compared to what you have already seen so don’t be afraid of hiking back in the dark.
- Talking about toilets – There are pit toilets located throughout the Enchantments trail. But if you are not near one, it is recommended to dig a cat hole if possible and cover it up with mud after use. Otherwise, it is ok to pee on flat rock surface or crevices in the rocks, away from vegetation. If you have to poop, it’s best to either use a cat hole or pack it out. More details here.
- Bear sighting is not common in this area so we did not carry any bear canisters. There is no strict requirement for them. Although do keep in mind to not leave anything with fragrance open and unattended to avoid attracting mountain goats. Where possible, hang food and scented items.
- Carry insect and mosquito repellants especially in the summer months and if camping in the Colchuck or Snow zones. We did not feel the need for bug spray as the temperatures were rather low in the Core zone.
- Lastly, most of the links shared on this page lead to the official website for recreation in the Enchantments. It is information rich and answers almost every question you may have regarding this hike.
Checkout our recommendations for backpacking gear and a complete checklist to help you get started.
