Self-Guided W Trek Itinerary: Patagonia Adventure
W Trek is the most popular multi-day hike in Patagonia and for good reason. It is called the W trek for the shape of the route this hike follows. Traversing the heart of Torres Del Paine National Park, the trek allows you to live the wilderness life while staying in minimalistic refugios with no network connectivity. The hike is typically done over 5 days and 4 nights but can be customized for duration as well as distance and direction. The hike covers all major viewpoints in the park and can be made guided or self supported.
Read our post on The Ultimate Patagonia Itinerary: 2 Weeks in Argentina & Chile to plan a complete Patagonian Adventure
Things to know before hiking the W Trek in Torres Del Paine National Park
How to hike the W Trek with Map
Torres del Paine W Trek hike directions with map
You could choose between self guided or a fully guided trek. However, we highly recommend self guided as the trail itself is well marked and well trodden. It is also much cheaper compared to the fully guided trek. After starting the hike, you will likely run into the same people on the trails and in the refugios so you will have plenty of opportunities to socialize with people from different nationalities. Goes to say that you don’t have to necessarily be part of a guided tour to meet different people.
W Trek Hiking Direction: East to West
Starting from Torre Central (Las Torres) and ending at Glacier Grey. You will conquer the hardest sections of the trek on the second and third day.
W Trek Hiking Direction: West to East
Starting from Glacier Grey and ending at Torre Central (Las Torres). Choosing this option is popular because the timing of the trail in this direction is optimized to get a classic sunrise view over the Towers on the final day of the hike.
Note that choosing the direction of your hike definitely depends on the availability of accommodation in the refugios. Read more on accommodation here : Where to Stay on the W Trek
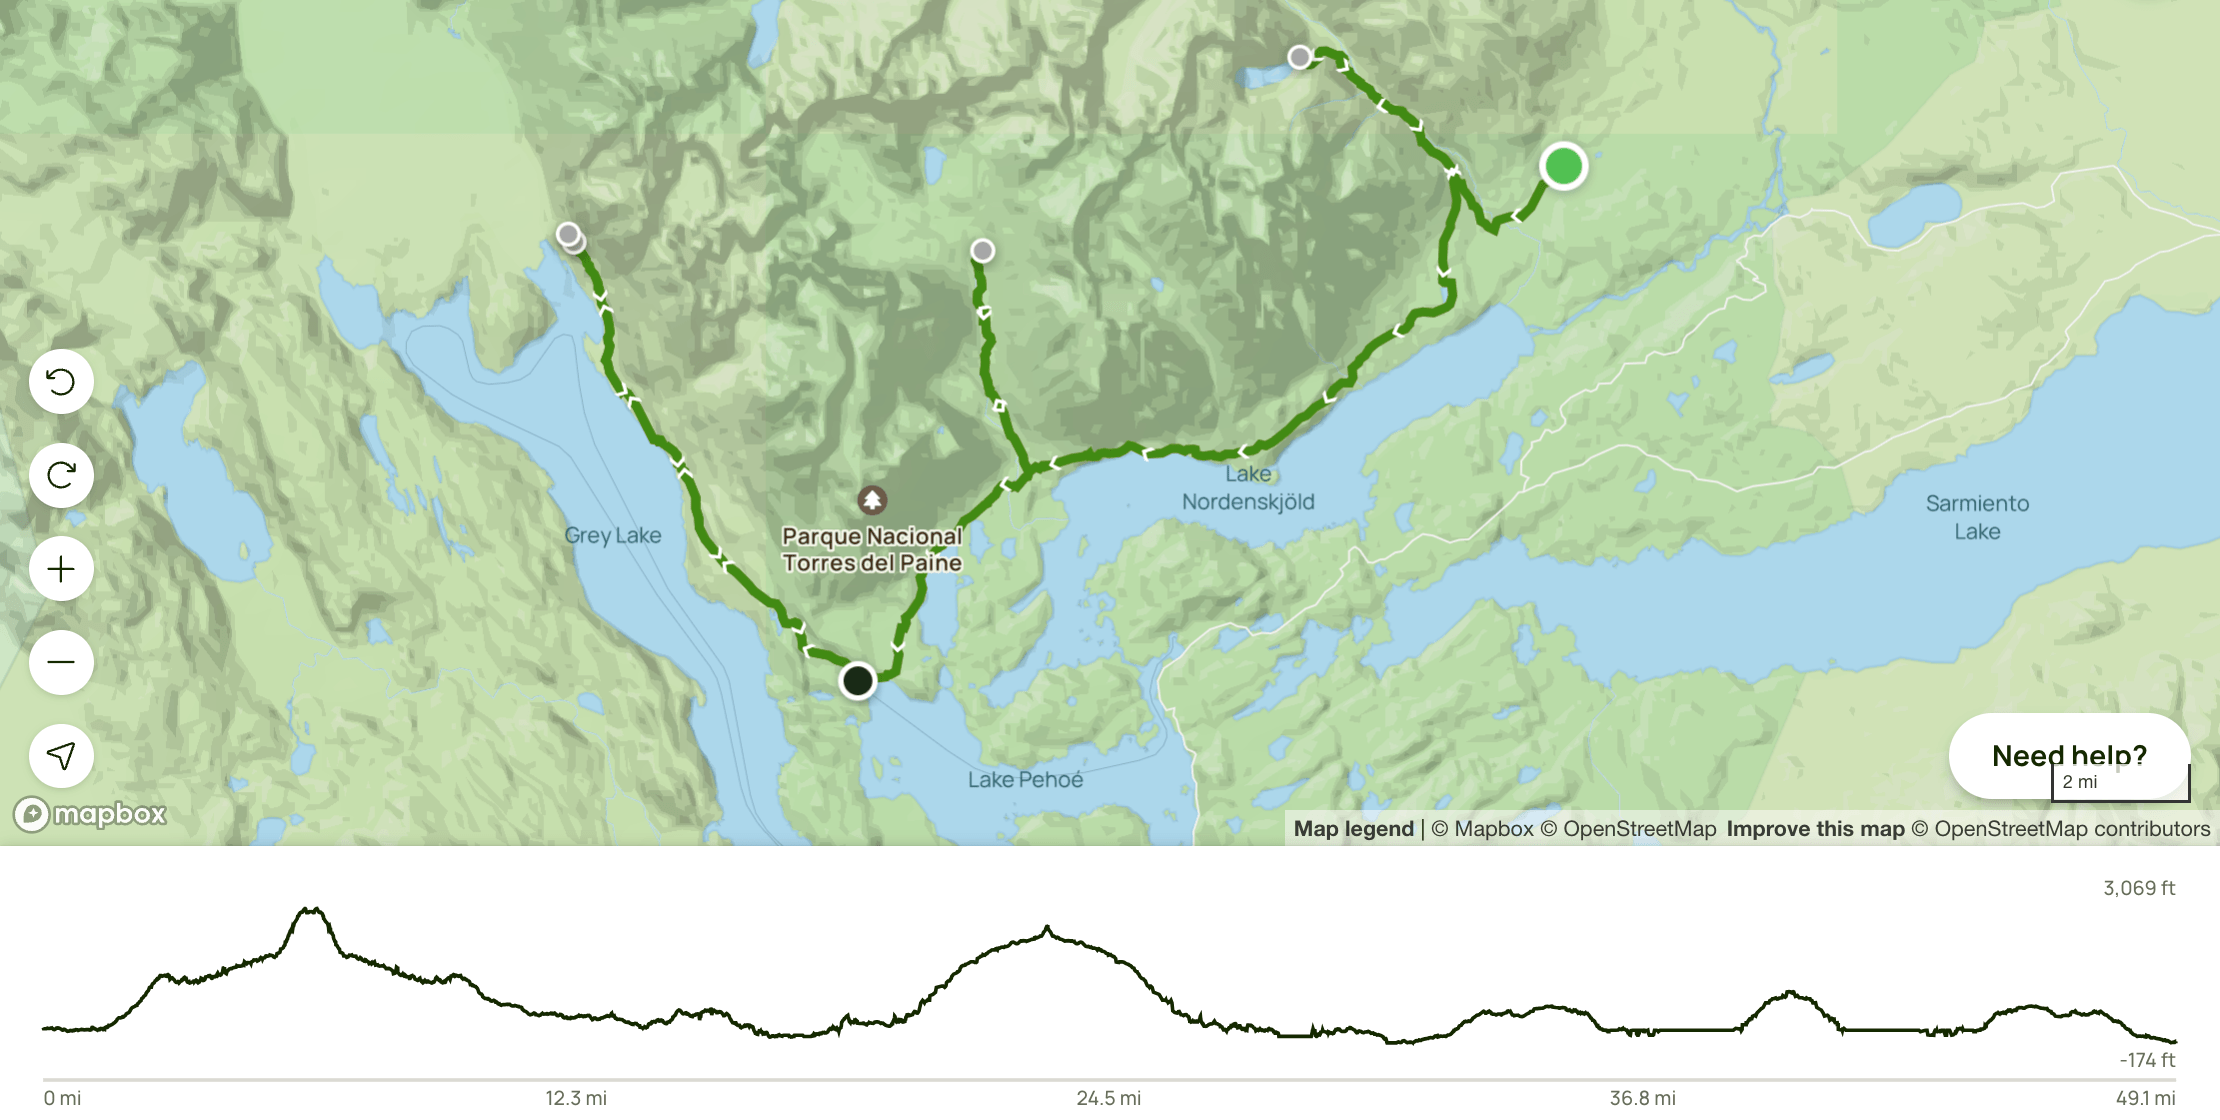
Here’s our All Trails Route of the W Trek to help independent hikers stay on trail.
Best Season to hike Torres del Paine W Trek
By the virtue of its location in the Southern Hemisphere, Patagonia experiences summer between the months of December and February. The long, warm days are ideal for hiking and outdoor activities. But these months also bring in gusts of fierce Patagonian winds. As with most places, travel in these months could get expensive and crowded.
November marks the beginning of Spring and is the shoulder season for travel. Accommodation prices are lower and crowds are thinner. An ideal season for photographers as wildflowers are in bloom and spotting wildlife is easy.
March and April are the autumn months and shoulder season for travel. Expect fewer crowds and lower accommodation prices. Another popular time of year among photographers. With cooler temperatures, not-so-strong winds and beautiful autumn colors, this is a great season for hiking.
May through October is officially winter. Most attractions and accommodations are closed this time of year.
Note: Highly recommend carrying layers and warm clothing. The weather could change drastically and unexpectedly, occasionally bringing rain showers and snow even in the Summer months. Wind gusts in the summer months are known to be notoriously strong in all of Patagonia.

How to reach Torres Del Paine National Park
We highly recommend utilizing the excellent network of buses and ferries to get to the park from Puerto Natales. The buses are comfortable and frequent providing plenty of opportunities to spot wildlife unique to this region. Depending on your plan for the day, you could get off at any of the four stops listed below.
Remember to Purchase Entrance Tickets to Torres Del Paine National Park in advance.
Laguna Amarga Stop
- O-circuit hike
- W-trek from East to West
- Day hiking Mirador Los Torres, Laguna Azul and Lago Nordenskjold trails
- Staying at Hotel Las Torres/Refugio Torre Central
Pudeto Stop
This is a ferry/catamaran dock stop for:
- W-Trek from West to East. You will need to take a catamaran/ferry to Paine Grande from here
- Staying at Paine Grande hotel/refugio/campsite
- Day hiking Salto Grande Waterfall, Mirador Cuernos, Mirador Frances & Mirador Britanico
Camping Pehoè Stop
- Staying at Explora Patagonia or Hosteria Pehoé/Pehoé campsite
- Day hiking Mirador Cóndor
Lago Grey Stop
- Staying at Hotel or taking catamaran/ferry to Refugio Grey
- Starting point of W-trek from West to East instead of starting from Paine Grande. You will need to take a ferry/catamaran from Hotel Grey to Grey campsite.
- Day hiking Glacier Grey Viewpoint (taking catamaran/ferry to Paine Grande)
Check out the bus schedules of the two companies that operate transportation to and from the park: Bus Sur and Turismo Zaahj
Note: All the above stops (including catamaran dock at Pudeto) allow for overnight parking if you choose to drive to the National Park from Puerto Natales.
Where to Stay in the Torres del Paine for W Trek
Most of the stay during W Trek is officially managed by two private companies – Vertice Patagonia and Las Torres Patagonia. Depending on the location, you have the following options:
- Rent bunk bed style dorms in the refugio
- Rent private cabins in the refugio
- Campsites with fully equipped tents
- A camp spot to pitch your own tent. Requires you to carry all camping gear.
We highly recommend booking as much in advance as possible since accommodation is limited and gets booked out fast. There are tourism agencies who can help book/customize your trip.
Refugios are simple mountain huts with very basic facilities. In Torres del Paine National Park, they typically cater to hikers embarking on the W Trek and help in breaking the hike down into 3 or 4 sections, allowing hikers to carry a smaller backpack. The refugios are clean and well maintained.
We highly recommend using Chile Nativo to customize & book your travel in Patagonia. They offer customized W Trek, O trek & many other activities/packages in the Patagonia region. They take care of end-to-end W trek reservations including accomodation, meals, transportation, etc. They even offer packed lunch for the day of the hike. They will help answer all your questions prior to the trip. We can vouch for their excellent customer service and competitive pricing.
Book now with Chile Nativo*
**Use coupon code “Beyondmustsee” to get a 5% discount on your booking***
Here’s a list of refugios you will encounter during the trek. If hiking East to West, you will arrive at Refugio Torre Central on Day 1. If hiking West to East, you will arrive at Refugio Paine Grande on Day 1.
| Refugio | Location | Details |
| Torre Central (Las Torres) | At the trailhead of the Base of the Towers hike. This is the starting point of W Trek for those hiking East to West of End point for those hiking West to East. | Accommodation type: Dorm rooms with bunk beds OR premium camping Access: Hiking not required. Official booking site: Torre Central(Las Torres) |
| Chileno (Las Torres) | Located approximately midway from Torre Central to the Base of the Towers hike | Accommodation type: Fully equipped Tent Camping Only Access: Hiking required. The best place to stay at to catch sunrise at the base of the Towers. Official booking site: Chileno (Las Torres) |
| Los Cuernos (Las Torres) | Located exactly halfway on the W trek route, at the base of an impressive granite rock formation called Cuernos del Paine or “The Horns” of the Paine range | Accommodation type: Dorm rooms with bunk beds OR private two-person cabins OR fully equipped Tent Camping Access: Hiking required. Official booking site: Los Cuernos(Las Torres) |
| Camping Francés (Las Torres) | Approx 1.5km from Los Cuernos. When trekking the W or O circuits, you will either stay at Los Cuernos or Camping Francés, but not both because of their proximity. | Accommodation type: Dome style accommodation, Fully equipped Tent Camping Access: Hiking Required Official booking site: Camping Francès(Las Torres) |
| Paine Grande (Vertice) | Located on the banks of Lake Pehoé. This is the end point of W trek for those hiking East to West or the starting point for those hiking West to East | Accommodation type: Dorm rooms with bunk beds inside Refugio Paine Grande OR fully equipped Tent Camping Access: Hiking OR boat ride across Lago Pehoé Official booking site: Paine Grande(Vertice) |
| Grey (Vertice) | Located at the Western end of the W Trek | Accommodation type: Dorm rooms with bunk beds OR fully equipped Tent Camping Access: Hiking OR catamaran from Hotel Grey Official booking site: Refugio Grey(Vertice) |
Wilderness camping is not allowed in Torres Del Paine National Park. However, the two private companies that manage accommodations at refugios (Vertice and Las Torres) rent out campsites only. This allows you to carry your own camping gear and equipment required to camp in the park. This is also the least expensive accommodation option.

Food in the Torres del Paine W Trek
When booking accommodation in refugios, there are some meal options to choose from for each day of the hike. Vegetarian options are available for all meals.
- Half Board: Includes breakfast & dinner
- Full Board: Includes breakfast, packed lunch & dinner
- Fully Independent: Requires you to pack meals for the entire duration of the trek
You could do a combination of the above on different days. On the days where you need to cover longer hiking distances, you could choose to go half or full board and opt out of buying meals on other days. The refugios offer simple food options, mainly designed to fuel hikers after a long day.
Torres del Paine W Trek Itinerary (East to West)
We hiked this trail East to West starting from Torre Central (Las Torres) and ending at Glacier Grey. We chose this direction mainly because of the availability of accommodations. We opted for full boarding which means our breakfast, packed lunch and dinner were taken care off by the refugios on all days. We stayed in fully equipped campsites throughout.
Day 1: Torre Central to Refugio Chileno
A slow start to our 5-day trek, this hike up to the refugio on Day 1 was a good way to brace ourselves for the upcoming days and made for a good warm up. We explored in an around the refugio and loved our camping spot which was setup against a tree.
Stats: Torre Central to Refugio Chileno
Distance : 3.5 miles point to point
Time: 2 hours
Elevation gain: 1360 ft
Rating: Moderate
Start: Torre Central
End: Refugio Chileno
Overnight Stay : Refugio Chileno
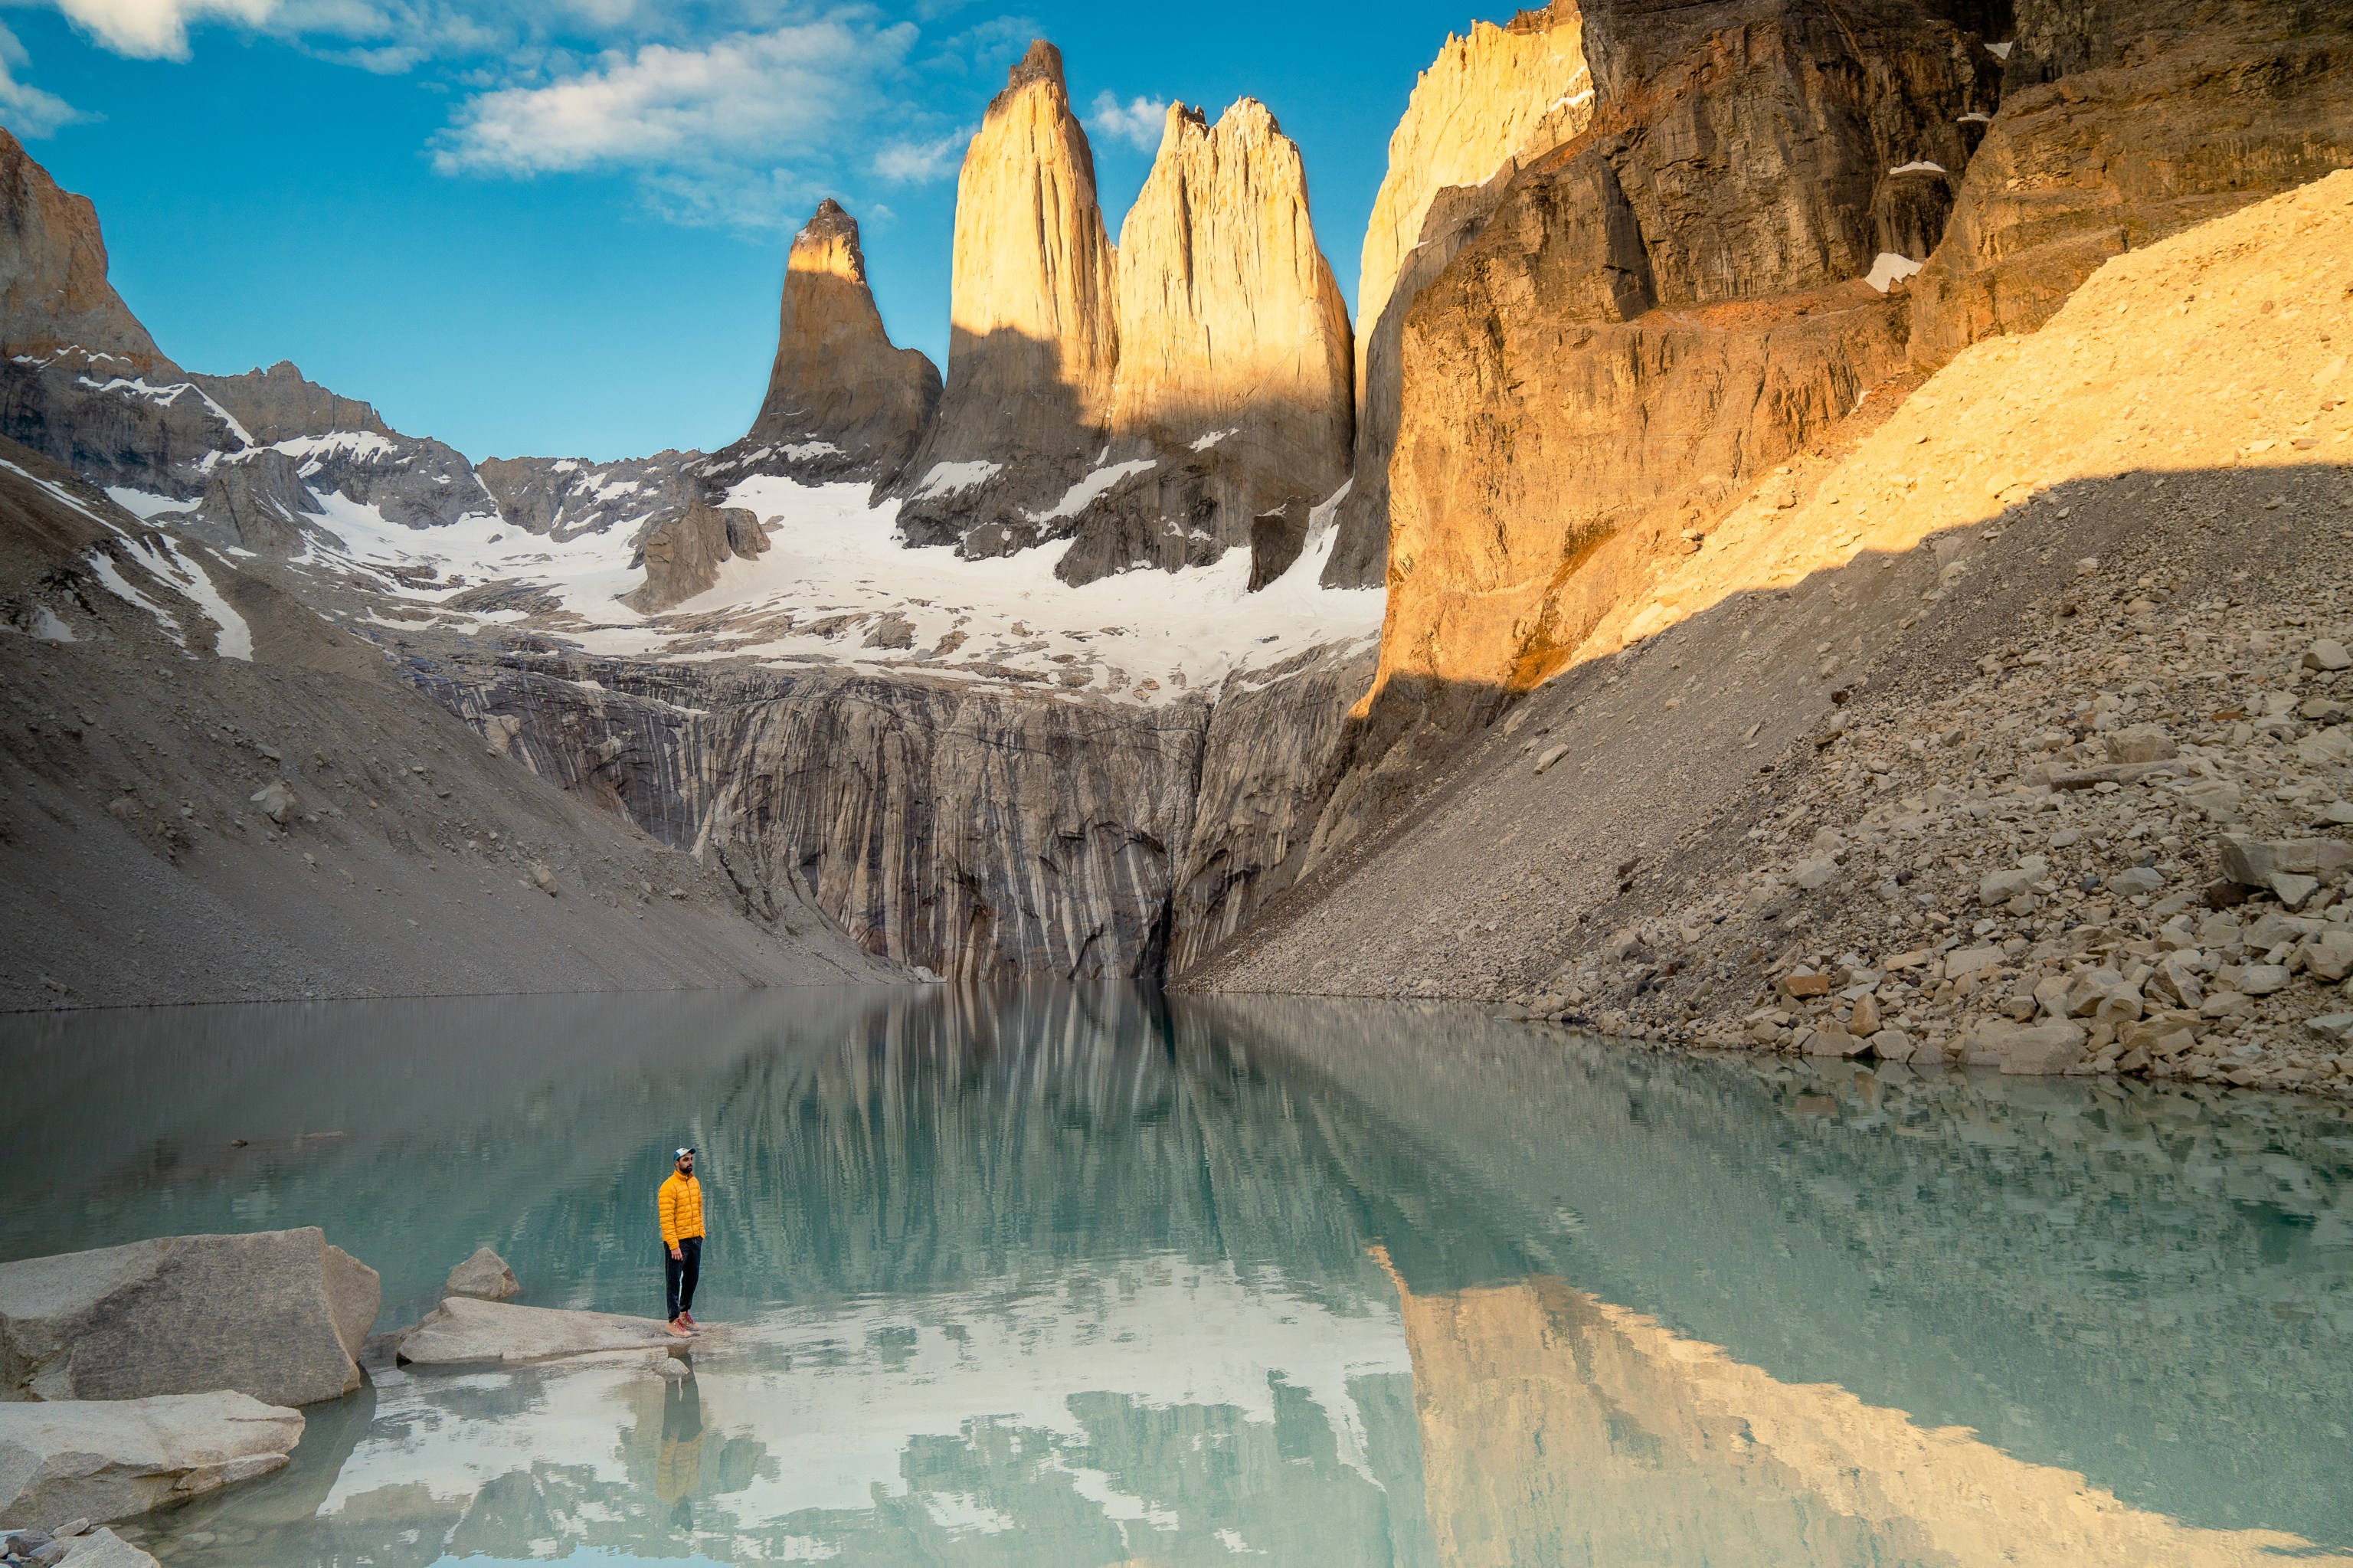
Day 2: Refugio Chileno to Refugio Los Cuernos – Detour Sunrise hike to Mirador Torres Del Paine (Towers)
We had an early start to what was going to be a long Day 2. We started our sunrise mission from Refugio Chileno with a daypack at 3:00am. The last half a mile is a butt kicker with almost 40% gradient but views at the top with the early morning sun hitting the towers and their reflection in the still lake is more than worth the effort.
Stats: Refugio Chileno to Mirador Torres Del Paine (Out & back)
Distance : 6 miles
Roundtrip Time: 4 hours
Elevation gain: 1450 ft
Rating: Moderate
We got back to the refugio in time for breakfast, then packed up and made our way towards Refugio Los Cuernos. This leg of the trail passes beautiful aqua blue lakes finally revealing views of the peaks of Cuernos del Paine or “Paine Horns”.

Stats: Refugio Chileno to Refugio Los Cuernos
Distance : 8 miles Point-to-Point
Time: 4 hours
Elevation gain: 1017 ft
Rating: Moderate
Start : Refugio Chileno
End: Refugio Los Cuernos
Overnight Stay : Refugio Los Cuernos
Note: You could either choose to spend the night at Refugio Cuernos or walk further to Camping Francés. This will add 2.3 miles and 500 ft of elevation gain to the hike on Day 2 but subtract the same from Day 3 as the trail continues via Camping Francés.
Day 3: Refugio Los Cuernos to Refugio Paine Grande – Detour hike to Mirador Britannica
This was the longest and the most challenging day for us. After breakfast at Refugio Los Cuernos, we made our way towards Campamento Italiano, the starting point of our detour hike to Valle de Francés and Mirador Britannico. The hike is mostly along the shores of Lake Nordenskjöld except the last stretch which climbs up about 500ft.
Stats: Refugio Los Cuernos to Campamento Italiano
Distance : 3 miles Point-to-Point
Time: 1.5 hours
Elevation gain: 600ft
Rating: Moderate
Start: Refugio Los Cuernos
End: Campamento Italiano
At Campamento Italiano there are wooden racks where you can leave your bigger bagpack and only carry a small daypack for the Roundtrip hike to Mirador Británico. This section makes the middle arm of the W trek and is an optional detour as it does add quite a bit of elevation gain and distance to the already long hike from Los Cuernos to Paine Grande. However, you will be treated to 360° panoramic views of the french valley surrounded by massive granite peaks.

Stats: Campamento Italiano to Mirador Británico (Out-and-back)
Distance : 6.4 miles
Time: 3-4 hours
Elevation gain: 1990 ft
Rating: Moderate
Start/End: Campamento Italiano
After arriving at Campamento Italiano, we picked up our bags and headed towards Paine Grande. The fatigue from previous days was starting to set in by this point and towards the end of this stretch it was only about one foot in front of the other until we reached Paine Grande.
Stats: Campamento Italian to Paine Grande
Distance : 4.6 miles Point-to-Point
Time: 2-3 hours
Elevation gain: 500 ft
Rating: Moderate
Start: Campamento Italiano
End: Refugio Paine Grande
Day 4: Refugio Paine Grande to Refugio Grey
Refugio Paine Grande is set on the shores of the beautiful Lago Pehoé. We highly recommend spending some time exploring around the lake. We had to return to Paine Grande on the last day (day 5) of the W Trek to catch the ferry back. So we decided to leave our bigger backpacks here and stuff our daypacks with essentials for one night’s stay at Refugio Grey.
The hike from Paine Grande to Refugio Grey treats you to unbeatable views of the Lake Grey on one side and Patagonian mountains on the other. As you get closer, views of the massive Glacier Grey start to reveal. We also heard thunderous sounds of what we imagined to be coming from icebergs calving into the lake.
Stats: Refugio Paine Grande to Refugio Grey
Distance : 7.2 miles Point-to-Point
Time: 3-4 hours
Elevation gain: 1100 ft
Rating: Moderate
Start: Refugio Paine Grande
End: Refugio Grey
Upon arriving at Refugio Grey, we took a short walk to the shores of Lago Grey. We were immediately treated to jaw-dropping views of icebergs floating in the lake reflecting the last light from the setting sun. In front of us sat the massive Glacier Grey. We highly highly recommend not missing this as it was one of the highlights of the entire trek!

Day 5: Refugio Grey to Refugio Paine Grande and return to Puerto Natales
When at Refugio Grey, there are multiple ways to experience the largest Glacier in Torres Del Paine National Park
- Boat ride on Lago Grey that takes you close to floating icebergs and Glacier Grey
- Ice hiking on Glacier Grey
- Kayaking in Lago Grey amidst floating icebergs close to the glacier
- Hiking to Glacier Grey
We chose to hike to the hanging bridges in the Gardner Pass that would take us closer to the glacier. Continuing further along this trail extends into the longer O-circuit trek. You could hike as long as you like, i.e until the first or second suspension bridge and return the same way.
Stats: Refugio Grey to Glacier Grey (Second Suspension Bridge)
Distance : 6.7 miles Roundtrip
Time: 3-4 hours
Elevation gain: 1446 ft
Rating: Moderate
Start/End: Refugio Grey

Around 11am we were on our return hike back to Refugio Paine Grande reaching in time to pack up and catch the last catamaran out.
Stats:
Distance : 7.2 miles Point-to-Point
Time: 3-4 hours
Elevation gain: 1100 ft
Rating: Moderate
Start: Refugio Grey
End: Refugio Paine Grande
As much as we were enamored by everything we had experienced in the last five days, our bodies were completely weighed down by fatigue and definitely thanked us for getting back on that catamaran.
Note:
- The Catamaran from Paine Grande to Pudeto can be booked online here : Book Catamaran to Pudeto. It’s not necessary to book online, it’s possible to book directly at Paine Grande Refugio
- The shuttle bus from Pudeto dock to Puerto Natales must be booked in advance
- Be sure to time the ferry arrival at Pudeto with the bus departure from Pudeto such that you need not wait very long
General Tips and Recommendations
- Always wear layers. Patagonia is known for being notoriously windy and experiencing all four seasons in a single day, even in the summer months.
- Carry Chilean Pesos. They are especially useful when booking ferries/catamarans or shopping locally.
- Carry daypack. Quite a few hikes can be done without needing to carry the entire backpack. Backpacks can be left behind in the refugios.
- Carry reusable water bottles. Potable water is available in all refugios and can also be consumed directly from flowing streams.
- Carry power banks and charging cables.
- Carry Bug repellants containing deet and picaridin as they are effective against mosquitos.

Leave a comment